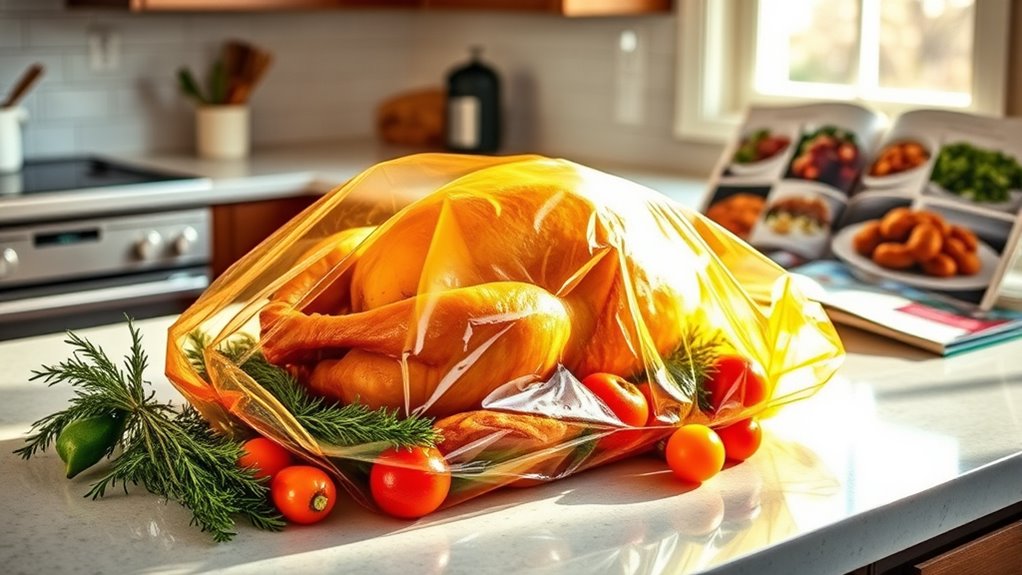
10 Steps to Perfectly Prepare Turkey in a Bag
Preparing a turkey can feel overwhelming, especially when you want it juicy and full of flavor without spending all day in the kitchen. You’re not alone—many people struggle with dry or bland turkey that doesn’t live up to holiday expectations.
Luckily, using a turkey bag simplifies the process and helps you achieve delicious results every time.
Using a turkey bag is your key to a juicy, flavorful turkey with less hassle. Start by gathering a quality turkey bag, a thawed turkey, and your favorite seasonings.
Clean and season the turkey, then place it in the bag with aromatics. Cook at 325°F until it reaches 165°F inside. Let it rest before carving to lock in flavors.
With smart seasoning variations and proper leftover storage, your turkey will shine. Uncover even more tips to perfect your technique!
Key Takeaways
- Use a high-quality turkey bag to lock in moisture and create even heat circulation for a juicier turkey.
- Preheat your oven to 325°F and make sure the turkey reaches an internal temperature of 165°F for safe consumption.
- Season the turkey generously with herbs and spices. Add vegetables too—they boost the flavor nicely.
- Let the turkey rest for 20 to 30 minutes after cooking. This helps redistribute the juices and makes it taste better.
- Store leftovers in airtight containers and try to eat them within 3 to 4 days for the best taste and safety.
Why Use a Turkey Bag for Cooking?
Using a turkey bag can improve your cooking game in several ways. First, the turkey bag benefits include keeping moisture locked in, which means you’ll end up with a juicier turkey. It creates a mini-oven effect, allowing the heat to circulate evenly around the bird. This not only enhances flavor but also guarantees that your turkey cooks more uniformly.
Another advantage is cooking efficiency. With a turkey bag, you can reduce cooking time by up to 30%, freeing you up to focus on other dishes or enjoy time with family. Cleanup’s a breeze too. Just toss the bag when you’re done, and you’ll minimize mess. Plus, you can easily add seasonings and aromatics inside the bag to infuse amazing flavors.
Gather Your Ingredients and Supplies
Gathering your ingredients and supplies is essential for a successful turkey in a bag. Start with a high-quality turkey bag, which offers benefits like moisture retention and even cooking. You’ll need a thawed turkey, typically 10 to 15 pounds, as well as seasonings like salt, pepper, and your favorite herbs.
Consider ingredient alternatives depending on your taste preferences. For instance, if you’re out of garlic powder, fresh garlic works just as well. Don’t forget to stock up on vegetables like onions, carrots, and celery, which can elevate the flavor and aroma.
Also, grab some kitchen twine to tie up the turkey legs and a roasting pan to catch those delicious juices. Having everything ready means you can focus on the fun part, cooking! So, gather your essentials, and you’ll be set for a delightful turkey feast.
Prepare the Turkey: Cleaning and Seasoning
Before you start seasoning, make sure your turkey is completely thawed and cleaned. It’s important to take a moment to follow some essential cleaning tips—that way, you’ll set the stage for great flavor. Once you’ve got that done, you can dive into some flavorful seasoning techniques to really make your turkey shine.
Thawing the Turkey Properly
Thawing your turkey properly is essential for a delicious meal and food safety. There are three main thawing methods you can use: in the refrigerator, in cold water, or in the microwave.
The refrigerator method is the safest and requires about 24 hours for every 4-5 pounds of turkey. If you’re short on time, the cold water method can be effective, but remember to change the water every 30 minutes.
Always use a thermometer to verify the turkey stays below 40°F. Avoid leaving your turkey out at room temperature, as this can lead to harmful bacteria growth. Following these safety tips will help guarantee your turkey is juicy, tender, and safe to eat.
Essential Cleaning Tips
Once you’ve thawed your turkey, it’s essential to clean it properly to guarantee a flavorful and safe meal. Practicing good kitchen hygiene is vital during this process. Start by washing your hands thoroughly with soap and water.
Then, follow these steps for effective cleaning: rinse the turkey inside and out under cold running water. Remove any giblets or neck from the cavity and rinse that area too. Finally, pat the turkey dry with paper towels to remove excess moisture.
Flavorful Seasoning Techniques
To create a delicious turkey, seasoning is just as important as cleaning. Start with spice blends that suit your taste, like paprika, garlic powder, and onion powder. You can also experiment with herb combinations like rosemary and thyme for a fresh flavor.
Marinade options are endless. Consider a mix of olive oil, vinegar, and your favorite spices to tenderize the meat. For a zesty twist, try citrus infusions using orange or lemon juices.
Dry rubs can add a nice crunch, so generously apply one before cooking. Finally, flavor injections can really enhance your turkey. Inject a mix of broth and herbs directly into the meat for a juicy, savory experience.
Enjoy the process and let your creativity shine!
Using a Turkey Bag: Step-by-Step
Using a turkey bag is a game changer for achieving a perfectly moist and flavorful bird. The turkey bag benefits include locking in moisture, reducing cooking time, and infusing your turkey with delicious flavors.
Here’s a simple step-by-step guide to using it effectively:
- Prepare the bag: Place the turkey inside the bag, ensuring it’s secured with a tie.
- Season generously: Apply your favorite spices and marinade inside the bag for maximum flavor.
- Vent the bag: Poke a few holes in the top to allow steam to escape, which helps prevent a soggy bird.
With these cooking tips, you’ll create a tender turkey that’s bursting with flavor. Enjoy the process, and watch your guests rave about your succulent dish!
Turkey Cooking Times
When it comes to cooking your turkey, timing really is everything. You’ll want to follow weight-based guidelines so your bird cooks evenly and stays juicy. And hey, don’t forget—letting it rest before carving makes all the difference for the best flavor!
Cooking Time Guidelines
Cooking your turkey in a bag can greatly simplify the process, but it’s important to follow the right cooking time guidelines to guarantee a perfectly roasted bird. Here are some cooking temperature considerations to keep in mind:
Preheat your oven to 325°F for ideal cooking. Check the internal temperature; it should reach 165°F in the thickest part of the turkey. Consider the turkey bag benefits; they help retain moisture and reduce cooking time.
Using a turkey bag can lead to a juicier, more flavorful result, so don’t overlook these vital steps. Following these guidelines makes certain your turkey is cooked safely and deliciously, making your meal a success.
Weight-Based Time Estimates
Knowing the cooking time based on your turkey’s weight is key to ensuring it’s perfectly done. Use weight estimates to determine how long to cook your turkey in the bag. A general rule is about 13-15 minutes per pound for unstuffed turkeys at 350°F.
For example, a 12-pound turkey typically takes 2.5 to 3 hours. If you’re using different cooking methods, like roasting or frying, adjust your time accordingly. Always check the internal temperature; it should reach 165°F in the thickest part of the breast and thigh.
Resting Period Importance
After you’ve cooked your turkey to perfection, don’t rush into slicing it. Allowing your turkey to rest is essential for achieving ideal results. During this resting period, the juices redistribute throughout the meat, improving its flavor and ensuring maximum tenderness.
Here are some key resting benefits:
- Juice Retention: Keeps the moisture locked in, preventing dry meat.
- Flavor Improvement: The resting period allows flavors to meld, enhancing taste.
- Easier Carving: A well-rested turkey is firmer, making slicing simpler and cleaner.
How to Check Turkey Doneness?
How can you be certain your turkey is cooked to perfection? Start by using reliable doneness indicators. The best way to check is with a meat thermometer. Insert it into the thickest part of the thigh, avoiding the bone. You’re aiming for a temperature measurement of at least 165°F (74°C). This guarantees harmful bacteria are eliminated, making your turkey safe to eat.
Another good indicator is the juices. If they run clear when you pierce the thigh, that’s a positive sign. The legs should also wiggle easily, indicating tenderness. Finally, check the breast meat; it should be firm and no longer pink.
Why Letting Your Turkey Rest Is Crucial
Letting your turkey rest is a total game changer for flavor, texture, and juiciness. When you give it some time to sit, those delicious juices get a chance to redistribute, which makes every bite way more flavorful. Plus, a well-rested turkey ends up with a tender, moist texture that everyone’s going to love.
Enhances Flavor Absorption
Resting your turkey for at least 20 to 30 minutes is essential for enhancing flavor absorption. When you let it sit, those delicious juices redistribute throughout the meat, ensuring every bite is packed with flavor.
Here are some effective flavor infusion techniques you can use:
Marinate with herb combinations: Use fresh herbs like rosemary and thyme for a robust flavor.
Season generously: A good rub can permeate the skin, enhancing taste as it rests.
Baste during cooking: This keeps the surface moist, allowing flavors to seep into the meat.
Improves Texture And Juiciness
While you may be keen to carve into your turkey right away, giving it time to rest is essential for achieving a tender, juicy texture. Resting allows the juices to redistribute throughout the meat, improving both texture and juiciness retention.
If you skip this step, you’ll likely end up with a dry turkey that lacks flavor.
| Time Rested | Texture Improvement | Juiciness Retention |
|---|---|---|
| 15 minutes | Noticeable | Moderate |
| 30 minutes | Significant | High |
| 1 hour | Ideal | Maximum |
| 2 hours | Exceptional | Unmatched |
Easily Carve Your Turkey Like a Pro
Carving your turkey doesn’t have to be an intimidating task; with a few simple techniques, you can slice it like a pro. First, make sure you have a sharp knife and a sturdy cutting board. Follow these essential turkey carving tips:
Carving your turkey can be easy and impressive with a sharp knife and a few simple techniques.
- Let it Rest: Allow your turkey to rest for at least 20 minutes before carving. This helps retain juices.
- Use Knife Techniques: Start by removing the legs and thighs, then slice the breast meat. Use long, smooth strokes for clean cuts.
- Angle Your Knife: Hold your knife at a slight angle to achieve thinner, more uniform slices.
With these steps, you’ll master turkey carving in no time. Remember, practice makes perfect, so don’t be afraid to jump in! Enjoy your beautifully carved turkey, and impress your guests with your newfound skills.
Turkey Seasoning Variations to Try
In the domain of elevating your turkey’s flavor, experimenting with different seasoning variations can make all the difference. Start with herb blends like rosemary and thyme for a classic touch, or try unique spice combinations that include cumin and paprika for a smoky twist.
Investigate diverse flavor profiles by integrating regional seasonings; Cajun spices can bring a kick, while Italian herbs offer a fragrant experience.
Citrus infusions, such as lemon or orange zest, add brightness to your turkey, balancing rich flavors beautifully. For a touch of sweetness, consider sweet glazes made from honey or maple syrup, which caramelize in the oven.
Don’t overlook savory marinades that incorporate garlic, soy sauce, or balsamic vinegar for depth. Finally, umami boosters like miso or mushrooms can transform your turkey into a flavor powerhouse. With these variations, you’ll create a turkey that’s anything but ordinary!
What to Do After Cooking: Storing Leftovers
Once your turkey has finished cooking and you’ve savored your meal, it’s essential to store leftovers properly to keep them fresh and flavorful. Here are some tips for effective leftover storage:
Cool Quickly: Let the turkey cool at room temperature for no more than two hours before refrigerating. This helps prevent bacterial growth.
Use Airtight Containers: Store your turkey in airtight containers to keep it moist and stop it from absorbing other odors.
Label and Date: Write the date on your containers. Most turkey recipes suggest eating leftovers within 3 to 4 days for the best taste.
Frequently Asked Questions
Can I Use a Reusable Turkey Bag for Cooking?
Yes, you can use a reusable turkey bag for cooking! Just make certain it’s made from heat-safe, reusable materials designed for high temperatures.
Follow the cooking guidelines carefully to guarantee your turkey cooks evenly and safely. Always check the bag for any signs of wear or damage before use.
With proper care, a reusable bag can be a great eco-friendly option to prepare your holiday feast deliciously!
What Types of Turkey Bags Are Best?
In terms of turkey bags, you’ll want ones made from oven-safe materials to guarantee safety and optimum cooking. Curiously, nearly 75% of cooks prefer using turkey bags for moisture retention.
Look for turkey bag sizes that fit your bird snugly; common sizes accommodate 12 to 24 pounds. Brands like Reynolds offer reliable options, so you can confidently prepare a juicy, flavorful turkey for your next gathering.
Can I Cook a Frozen Turkey in a Bag?
You can’t cook a frozen turkey in a bag directly; it’s best to thaw it first. If you try cooking it frozen, you’ll run into uneven cooking and longer cooking times, which can lead to food safety issues.
Thaw your turkey in the fridge for a few days, then season and place it in the bag. This way, you’ll guarantee a perfectly cooked, juicy turkey that everyone will enjoy!
How Do I Avoid Turkey Bag Leaks?
To avoid turkey bag leaks, start by confirming the bag is intact without any holes. When you place the turkey inside, secure the edges tightly with a twist tie or string. This helps in preventing spills during cooking.
Furthermore, place the bag in a roasting pan to catch any possible drips. Remember to check the bag periodically while cooking to make sure it’s holding up well. Enjoy your delicious, mess-free turkey!
Is Turkey Safe to Cook in an Oven Bag?
Absolutely, turkey’s safe to cook in an oven bag! In fact, studies show that using an oven bag can reduce cooking time by up to 30%, making it a popular choice.
When considering turkey bag safety, confirm the bag is specifically designed for cooking and follow the manufacturer’s instructions. This cooking technique helps retain moisture, resulting in a juicy turkey.
Just remember to check the internal temperature to guarantee it’s fully cooked!
Conclusion
So, you thought cooking a turkey was an intimidating task, huh? With a turkey bag, you’ve just transformed it into a breezy affair! Who knew that sealing in flavors could be this easy?
While your friends are wrestling with dry, overcooked birds, you’ll be serving up a juicy masterpiece. Remember, it’s all in the bag!
Now, as you bask in your culinary glory, don’t forget to save some leftovers. After all, turkey sandwiches are the real prize when you use a turkey bag!