7 Simple Steps to Cook Turkey in a Bag Perfectly
Cooking turkey can be intimidating, especially when you want it to come out juicy, flavorful, and hassle-free. You’re not alone—many people struggle with dry or unevenly cooked birds.
If you’ve been searching for a foolproof method, cooking turkey in a bag might be the answer you’ve been looking for.
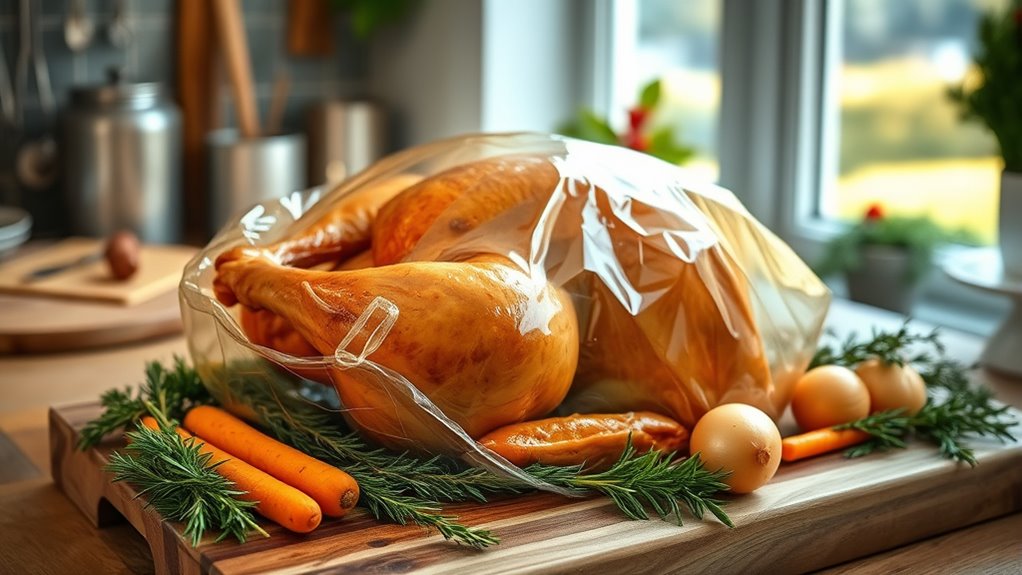
To cook turkey in a bag perfectly, start by gathering a quality turkey, oven-safe cooking bag, and seasonings. Apply your favorite spices, then place the turkey in the bag and seal it tightly.
Preheat your oven and set the turkey to roast based on its weight. Aim for an internal temperature of 165°F.
After cooking, let it rest before carving. Cleanup’s a breeze with minimal mess.
Stick around to uncover more tips for a flawless turkey!
Key Takeaways
- Select a fresh or fully thawed turkey and preheat your oven to the recommended temperature before starting.
- Apply seasonings evenly on the turkey and stuff it with aromatics for enhanced flavor.
- Place the seasoned turkey in an oven-safe cooking bag and seal it securely to keep the moisture in.
- Monitor cooking time based on the turkey’s weight, aiming for an internal temperature of 165°F (74°C).
- Let the turkey rest after cooking, then carve and serve. Be sure to store any leftovers safely.
Why Use a Roasting Bag?
Using a roasting bag can improve your turkey cooking game in several ways. First, the roasting benefits are hard to ignore; the bag traps heat and moisture, ensuring your turkey stays juicy and tender. You’ll appreciate the moisture retention, which helps prevent that dreaded dry meat.
Plus, the bag advantages extend to flavor improvement. As the turkey cooks, the sealed environment allows seasonings to penetrate the meat deeply, leading to a more flavorful result.
The sealed environment of the roasting bag enhances flavor, allowing seasonings to deeply penetrate the turkey for a delicious result.
Cooking efficiency is another key factor. The bag can reduce cooking time, so you spend less time waiting and more time enjoying your meal.
Finally, let’s not forget about easy cleanup. After your delicious turkey is done, you simply toss the bag away, leaving you with minimal mess. By using a roasting bag, you’re making your cooking experience smoother and more enjoyable.
Gather Your Ingredients and Tools
Before you start cooking, you’ll want to gather all your ingredients and tools. Make sure you have everything on hand—from the turkey to the roasting bag and any seasonings you plan to use. A little preparation goes a long way in making the process smooth and enjoyable. So, take a few minutes to get everything ready before you dive in. It’ll make things much easier!
Essential Ingredients Needed
To successfully cook a turkey in a bag, gathering the right ingredients and tools is essential. Start by choosing a turkey variety that suits your taste, whether it’s a classic Butterball or a heritage breed.
Next, consider your seasoning options to improve the flavor. Here’s a quick list of what you’ll need:
- A turkey (12-20 pounds)
- A cooking bag (oven-safe)
- Seasonings (salt, pepper, herbs)
- Vegetables (onions, carrots, celery)
- Broth or wine (for moisture)
With these ingredients, you’ll set yourself up for a delicious turkey. Don’t forget to prep your seasoning mix and veggies, as they’ll contribute to a flavorful, juicy bird. Happy cooking!
Recommended Cooking Tools
Gathering the right cooking tools is essential for a successful turkey in a bag. First, you’ll need a quality cooking bag designed for roasting. These bags help lock in moisture and flavor while ensuring even cooking.
Next, grab a sturdy roasting pan; it should fit the turkey comfortably and catch any drippings. A meat thermometer is vital, too, as it’ll help you monitor the internal temperature for perfect doneness.
Don’t forget oven mitts for safety and a carving knife for serving. If you have kitchen twine, it can be useful for securing the bag. With these tools in hand, you’re ready to master your roasting techniques and create a delicious turkey meal!
Preparation and Organization Tips
Successful turkey preparation starts with a well-organized kitchen. Before you plunge into cooking, gather everything you need. This not only saves time but also makes the process smoother.
Here are some essential items to have on hand:
- Fresh or thawed turkey (check your turkey storage)
- Cooking bag and tie
- Seasoning variations (herbs, spices, or marinades)
- Meat thermometer
- Roasting pan
Make certain your ingredients are fresh and ready to go. If you’re using different seasoning variations, have them measured out for convenience. This organization will help guarantee that your turkey turns out perfectly cooked and flavorful.
Being prepared allows you to focus on enjoying the cooking experience rather than scrambling for items.
How to Season Your Turkey for Maximum Flavor
Wondering how to bring out the best flavor in your turkey? Start by choosing the right herb blends. A combination of rosemary, thyme, and sage can enhance your turkey’s flavor profile considerably. Mix these herbs with olive oil, garlic, and lemon juice to create a marinade that penetrates the meat beautifully.
Next, don’t forget to season the inside of the cavity. A few sprigs of fresh herbs, along with onion and citrus, can add depth. For an extra kick, consider using spices like paprika or cayenne in your seasoning mix.
Rub the marinade all over the turkey, making sure every inch is coated. Let it sit for at least an hour, or even overnight in the fridge, to allow the flavors to meld. By taking these steps, you’ll guarantee your turkey is bursting with flavor, making it the star of your meal. Enjoy the delicious results!
Prepare the Turkey for Roasting
After seasoning your turkey to perfection, it’s time to prepare it for roasting. Depending on the turkey types you choose, you may want to contemplate brining methods to improve moisture and flavor. Here are some steps to guarantee your turkey is ready for the oven:
Check the turkey for any leftover feathers and remove them. Then, pat the turkey dry with paper towels; this helps the skin crisp up.
If you’ve opted for a brined turkey, rinse it under cold water to remove excess salt. Next, tuck the wings underneath the turkey to promote even cooking.
Finally, place the turkey in a roasting bag, making sure it’s sealed properly to lock in moisture.
Cooking Time and Temperature for Perfect Turkey
Cooking a turkey to perfection hinges on two key factors: time and temperature. Understanding these elements helps you achieve a juicy, flavorful bird. The cooking time largely depends on the turkey weight and chosen cooking methods.
For a turkey in a bag, follow the guidelines below:
| Turkey Weight | Cooking Time (Hours) |
|---|---|
| 8-12 lbs | 2.5 – 3.5 |
| 12-14 lbs | 3 – 4 |
| 14-18 lbs | 4 – 4.25 |
Aim for an internal temperature of 165°F (74°C) in the thickest part of the breast and the innermost part of the thigh. Using a meat thermometer guarantees you don’t overcook or undercook the turkey.
Keep an eye on the time, and you’ll serve up a delicious meal that impresses everyone at the table!
The Importance of Letting Your Turkey Rest
Letting your turkey rest is essential for guaranteeing it stays juicy and flavorful. When you allow your turkey to rest, you reveal several rest benefits that improve its overall taste and texture. Here’s why you shouldn’t skip this important step:
- Juiciness Retention: Resting allows the juices to redistribute throughout the meat.
- Flavor Improvement: The flavors meld together, making each bite more delicious.
- Easier Carving: A rested turkey is firmer and easier to slice.
- Reduced Dryness: It helps prevent moisture loss when cutting.
- Perfect Serving Temperature: Waiting a bit guarantees your turkey isn’t scalding hot when served.
Taking the time to rest your turkey can transform your meal, making it a standout dish at your table. So, resist the urge to carve immediately; let it rest for at least 20-30 minutes before serving for the best results!
How to Carve and Serve Your Turkey
Carving and serving your turkey can be a rewarding experience, especially when done right. Start by using proper carving techniques. First, remove the legs and thighs by cutting through the joint. Then, slice the breast meat by positioning your knife parallel to the breastbone, making even cuts. This not only looks great but also guarantees everyone gets a juicy portion.
Once carved, consider your serving suggestions. Arrange the turkey slices on a platter, garnishing with fresh herbs or citrus slices for a pop of color. If you’ve made a flavorful gravy, serve it on the side for guests to drizzle over their turkey.
Don’t forget to provide an assortment of sides, like mashed potatoes or roasted vegetables, to complement your beautifully carved turkey. With these techniques and suggestions, your turkey will be the star of the meal, impressing everyone at the table!
Frequently Asked Questions
Can I Reuse a Roasting Bag After Cooking?
You can’t really reuse a roasting bag after cooking, as it’s designed for one-time use. While roasting bags offer great benefits like keeping your turkey moist and enhancing flavor, they often become weak or punctured during cooking.
If you want to reduce waste, consider using them for other non-cooking purposes. For cleaning tips, simply wipe them down if you’re using them for storage, but don’t attempt to reuse them for cooking.
What Size Roasting Bag Do I Need for My Turkey?
You’ll want a roasting bag that comfortably fits your turkey, so aim for a bag size that accommodates 12 to 24-pound birds. For those larger gatherings, a jumbo-sized bag works wonders!
Is It Safe to Cook Other Foods in the Bag?
Yes, it’s safe to cook other foods in the bag, as long as you follow cooking safety guidelines. Make certain the bag materials are suitable for the foods you’re using, and check the temperature limits.
Avoid cooking foods that release excessive fat or moisture, as they might compromise the bag’s integrity. Always monitor cooking times and temperatures to guarantee everything cooks evenly and safely.
Enjoy your delicious meals!
How Do I Store Leftover Turkey in the Bag?
To store leftover turkey in the bag, let it cool completely first. Once it’s cooled, seal the bag tightly and make sure there’s no excess air trapped inside.
Keep it in the fridge if you plan to eat it within a few days, or freeze it for longer storage. Always check bag safety; if it’s damaged or leaking, transfer the turkey to a different container.
Enjoy your leftovers safely!
Can I Use a Roasting Bag in an Air Fryer?
Yes, you can use a roasting bag in an air fryer, but first verify it’s safe for that temperature. Roasting bags help keep your turkey moist and tender, which is a great benefit. Just check the bag’s instructions for air fryer safety and avoid overfilling it to ensure proper airflow.
Also, keep an eye on the cooking time since it might differ from traditional methods. Enjoy a juicy turkey with less mess!
Conclusion
Now that you’ve mastered these steps, your turkey will not only be cooked perfectly but will also become the centerpiece of your feast. Just imagine the aroma filling your home, drawing everyone to the table with enthusiastic anticipation.
By using a roasting bag, you’ve guaranteed moisture and flavor, making every bite a delight. So, as you carve and serve, keep in mind this isn’t just a meal; it’s a cherished memory in the making.
Enjoy every moment of cooking turkey in a bag perfectly, knowing you’ve created something truly special for everyone to enjoy.