DIY Guide to Make a Bag Out of Wrapping Paper
If you’ve ever struggled to find a unique, personalized gift presentation, you’re not alone. Many people want to add a special touch without spending a fortune or buying something generic.
That’s why making a bag out of wrapping paper is such a fun and creative solution. You can easily make a stylish bag using wrapping paper.
Start by gathering materials like scissors, tape, and a sturdy base. Choose your wrapping paper based on the occasion and the recipient’s taste.
Fold the paper to create the bag shape, ensuring you secure the bottom and handles well. Don’t rush; clean folds and secure seams are key to a durable finish.
Stick around for tips on decorations and other creative projects you can try with leftover materials!
Key Takeaways
- Choose sturdy wrapping paper and consider reinforcing it with cardstock or fabric for added durability and structure.
- Fold the paper neatly and secure seams with tape or glue for a polished finish.
- Personalize your bag by selecting patterns that match the occasion and adding embellishments like charms or stickers.
- Make sure handles are securely attached using ribbon or string to prevent breakage when carrying items.
- Embrace eco-friendliness by recycling wrapping paper and customizing it for unique, reusable gift bags.
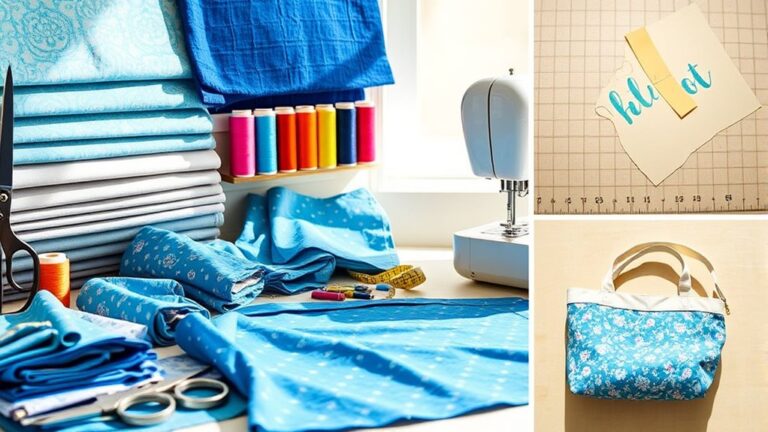
Gather Your Supplies
To create your DIY bag from wrapping paper, you’ll need a few essential supplies. First, gather your favorite wrapping paper, as this will be the focal point of your design. Look for patterns and colors that inspire you. This is your chance to showcase your style!
Gather your favorite wrapping paper as the centerpiece of your DIY bag, showcasing the patterns and colors that inspire your unique style!
You’ll also need scissors, tape, and a ruler to guarantee clean lines and precise folds. Don’t forget a sturdy base, like cardstock or poster board, to give your bag structure.
If you’re exploring material alternatives, consider using fabric scraps or old newspapers for a unique twist. These options can add texture and character to your design.
Finally, grab some ribbon or string for handles, adding that perfect finishing touch. With these supplies in hand, you’re ready to start crafting a stylish and functional bag that reflects your personality!
Choose the Right Wrapping Paper
Now that you’ve gathered your supplies, it’s time to pick the perfect wrapping paper for your DIY bag. Consider the gift themes you’re working with. If it’s for a birthday, vibrant colors and fun patterns can set the mood.
For a more elegant occasion like a wedding, choose sophisticated designs with subtle hues. Think about the paper patterns, too. Stripes, polka dots, or floral prints can all add flair to your bag.
Make sure the patterns complement the theme of your gift. If you’re unsure, go for classic designs that suit various occasions and won’t clash with your gift. Also, consider the paper’s thickness; sturdier paper will hold up better for a bag.
Finally, keep in mind that the wrapping paper should reflect your recipient’s tastes. With the right choice, your DIY bag will not only be functional but also a delightful part of the gift experience.
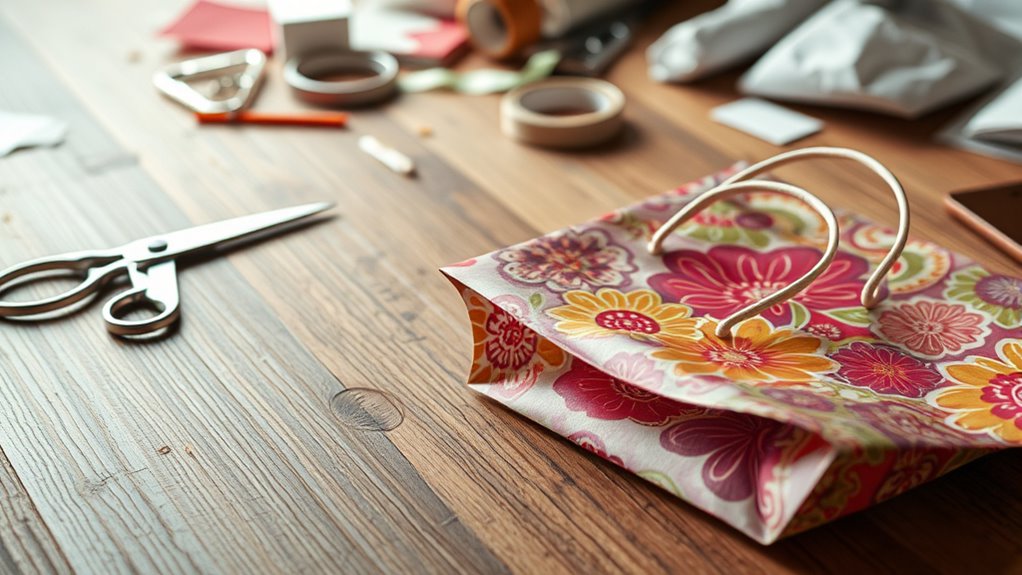
How to Create Your DIY Wrapping Paper Bag
Now that you’ve picked the perfect wrapping paper, it’s time to create your DIY bag. You’ll need just a few materials and some simple instructions to get started. So, let’s jump right into the steps that’ll turn your wrapping paper into a stylish bag!
Materials You Will Need
Creating a stylish DIY bag from wrapping paper is a fun and eco-friendly project that requires just a few materials. First, choose your wrapping paper types. Opt for thicker options, as they hold up better.
You’ll also need scissors to cut the paper to your desired dimensions. If you’re making smaller bags for gifts, aim for a paper size of about 15×20 inches. For larger items, go for 20×30 inches.
Don’t forget tape or glue to secure the seams. A hole punch and ribbon or string can add a nice touch for handles. With these materials, you’re ready to create a unique bag that’s perfect for any occasion!
Step-by-Step Instructions
To craft your DIY wrapping paper bag, start by laying your chosen paper flat on a clean surface. Next, fold the paper in half lengthwise, making sure the design pattern is on the outside. After that, create a base by folding each end about two inches inward, then fold the bottom up to secure it.
To improve your bag, consider using different techniques, like adding handles or embellishments. Here’s a simple table to help you examine design patterns:
| Technique | Description | Example |
|---|---|---|
| Folded Handles | Create handles by folding paper strips | Ribbon or twine |
| Stamped Design | Use stamps for patterns | Flower motifs |
| Layering | Combine multiple papers | Colorful layers |
| Cutouts | Make shapes in the paper | Heart or star |
| Painting | Add colors with acrylics | Abstract art |
Now, finish your bag by securing any loose ends. Enjoy your creation!
Tips for Folding and Securing the Bag
While you might think folding a bag from wrapping paper is straightforward, a few key tips can make the process smoother and more effective. First, choose your folding techniques wisely. Start with crisp, clean folds; this not only improves the bag’s appearance but also provides structural integrity. Use a bone folder or the edge of a ruler to achieve sharp creases.
When it comes to securing methods, consider using double-sided tape or glue for a neat finish. If you prefer a temporary option, paper clips can hold everything in place while you finalize your design.
Don’t forget to reinforce the bag’s bottom by folding the sides inwards, creating a sturdy base. And if you’re adding handles, make sure they’re securely attached using tape or glue to prevent any mishaps. With these tips, your wrapping paper bag will be both functional and stylish!
Common Mistakes When Crafting Your Bag
When you’re crafting your bag, it’s easy to overlook some important details. For example, ignoring the thickness of your paper can end up making your bag flimsy. And if you skip the reinforcement steps, your bag might not be as sturdy as you want it to be. So, let’s take a closer look at these common mistakes to make sure your creation holds up well.
Ignoring Paper Thickness
| Paper Type | Durability |
|---|---|
| Thin Wrapping Paper | Low |
| Medium Wrapping Paper | Moderate |
| Thick Wrapping Paper | High |
Choosing the right thickness affects both the bag’s function and style. So, be mindful of your choice to make sure your DIY bag holds up beautifully!
Skipping Reinforcement Steps
One of the most overlooked aspects of crafting your DIY bag is skipping essential reinforcement steps, which can lead to a disappointing outcome. To guarantee your bag holds up, focus on design techniques that improve paper durability.
For instance, adding a sturdy base or double-layering the sides can greatly increase strength. Don’t just rely on the wrapping paper’s appearance; consider how it will perform under pressure.
Use adhesive strategically to reinforce corners and seams, as these areas often bear the most weight. Remember, a well-constructed bag not only looks good but also functions effectively.
Creative Ways to Personalize Your Wrapping Paper Bag
While creating a DIY bag from wrapping paper is fun, personalizing it can improve your gift-giving experience. Start by choosing personalized designs that reflect the recipient’s interests. You might use their favorite colors or a theme that resonates with them. Adding unique embellishments, like stickers, ribbons, or hand-drawn doodles, can make your bag stand out.
Consider incorporating their name or initials with decorative lettering for an extra special touch. You can also attach a small charm or tag that relates to the gift inside. If you’re feeling crafty, try using stencils to create patterns or shapes on the bag.
Don’t forget about the handles. You can wrap them in complementary ribbon or washi tape to match the overall design. These simple yet creative touches will make your wrapping paper bag not just a container, but a cherished part of the gift.
Reinforce Your Bag
To make your wrapping paper bag sturdy, you’ll want to choose materials that can handle a bit of wear and tear. Think about adding some structural support, like a cardboard base—it really helps keep the shape and adds durability. With these simple tweaks, your bag will be ready for any occasion!
Choose Sturdy Materials
Choosing sturdy materials is essential for reinforcing your DIY bag, as it guarantees durability and functionality. Start with high-quality wrapping paper, ideally thicker sheets that can withstand wear and tear.
If you want extra strength, consider paper alternatives like cardstock or even laminated paper. These options improve material durability and prevent tears during use.
To attach the handles, choose robust materials like cotton or jute rope, which can bear weight better than flimsy options. Also, think about adding an inner lining using fabric or another layer of paper for extra reinforcement.
This thoughtful selection of materials will guarantee your bag remains stylish while standing the test of time. Happy crafting!
Add Structural Support
Adding structural support not only strengthens the bag’s durability but also improves its overall shape. To achieve this, consider different paper types; heavier options provide better reinforcement.
Utilize effective structural techniques like layering or adding a cardboard base for weight distribution. Choose the right adhesive, as strong glue or double-sided tape can make a big difference.
Investigate various reinforcement methods, such as folding strategies that create pleats or gussets, enhancing both strength and design considerations. Guarantee you balance aesthetics with functionality to maintain your bag’s appeal.
How to Decorate Your Bag for Special Occasions
Transforming your DIY bag into a stunning accessory for special occasions can be a fun and creative process. Start by considering the theme of the event and choose color themes that resonate. Incorporate seasonal designs to make your bag stand out.
Transform your DIY bag into a stunning accessory by aligning it with your event’s theme and seasonal colors for a standout look.
Here are some ideas to enhance your bag:
- Gift Embellishments: Add small charms or decorative tags.
- Event Motifs: Use stickers or stencils that represent the occasion.
- Personalized Messages: Write a special note or quote that reflects the sentiment.
- Ribbon Accents: Tie a beautiful ribbon around the handle for an elegant touch.
Experiment with texture contrasts by combining different materials, like lace or fabric, alongside the wrapping paper. Utilize various embellishment techniques, like layering or crumpling, to create depth and interest. These thoughtful touches will guarantee your bag is not just functional, but also a memorable part of your celebration.
Eco-Friendly Reasons to Use Wrapping Paper
When crafting a DIY bag, using wrapping paper not only adds a personal touch but also supports eco-friendly practices. By opting for this creative approach, you adopt sustainable alternatives that reduce waste and promote recycling benefits.
Here’s a quick comparison to highlight why wrapping paper is a great choice:
| Aspect | Wrapping Paper | Traditional Bags |
|---|---|---|
| Sustainability | Easily recyclable | Often non-recyclable |
| Reuse Potential | Can be reused | Limited reuse |
| Environmental Impact | Lower carbon footprint | Higher footprint |
| Creativity | Highly customizable | Standard designs |
| Cost | Usually affordable | Can be pricey |
Other DIY Projects With Leftover Materials
Once you’ve crafted your DIY bag from wrapping paper, consider the many other projects you can tackle with leftover materials. Upcycling is a fantastic way to reduce waste and release your creativity. Here are some fun ideas to inspire you:
After making your DIY bag, explore endless upcycling possibilities to spark your creativity and reduce waste.
- Glass Jars: Transform them into charming candle holders or storage containers.
- Fabric Scraps: Use them for patchwork coasters or colorful wall art.
- Old T-Shirts: Cut them into reusable shopping bags or quirky pillow covers.
- Tin Cans: Decorate and use them as planters or desk organizers.
Each of these projects lets you repurpose materials you might otherwise toss. Whether you’re diving into cardboard projects, creating magazine art, or working with wooden pallets and yarn remnants, there’s no shortage of upcycled crafts to investigate. Welcome your creativity and make something unique today!
Frequently Asked Questions
Can I Use Any Type of Wrapping Paper?
You can use many types of wrapping paper, but some work better than others. Standard gift wrap types, like glossy or metallic, might tear easily, while thicker, matte paper can hold up better.
If you’re looking for eco-friendly options, consider using recycled paper or fabric wraps. These choices not only look great but also reduce waste, making your bag more sustainable.
Just guarantee whatever you pick is sturdy enough for your needs!
How Much Wrapping Paper Do I Need?
To guarantee your creation flourishes, you’ll need to take into account wrapping paper measurements that align with your bag dimensions. Generally, a standard size of 20×30 inches should suffice for small to medium bags.
If you’re aiming for something larger, adjust accordingly. More paper means a roomier bag. Always err on the side of generosity; it’s better to have a little extra than to find yourself short. Happy crafting!
Can Children Help With This Project?
Absolutely, children can help with this project! It’s a fantastic way to encourage creativity. You can give them child-friendly tools like safety scissors and non-toxic glue.
Let them design their own patterns or choose colors that they love. By involving them, you’ll not only make the process more fun but also create unique, personalized bags.
Just supervise and enjoy the creative designs you both come up with together!
How Long Does the Bag Last?
The bag’s durability really depends on several factors, like how you handle it and the type of wrapping paper you use. If you’re gentle, it can last a few uses, but it won’t hold up against heavy items.
Plus, consider the environmental impact. Paper bags decompose faster than plastic, but they still require resources to produce. So, while it’s a fun project, keep in mind that its lifespan is limited.
What Are Alternative Materials to Use?
You can use a variety of alternative materials when making a bag. Recycled materials, like old newspapers or cardboard, work great for a sturdy option.
If you prefer something softer, fabric options like cotton or canvas are fantastic choices. They allow you to create a more durable and stylish bag.
Upcycling old clothes or linens not only gives your bag character but also helps the environment. Get creative and have fun with your selections!
Conclusion
You’ve crafted a unique bag that not only showcases your creativity but also repurposes materials you might’ve tossed aside. Sure, some might think wrapping paper’s too delicate, but with a few simple reinforcements, your bag can be surprisingly sturdy.
Plus, it’s a fun way to personalize gifts for friends and family. So go ahead, welcome your DIY spirit! You’ll not only save money but also create something special that reflects your style.
Happy crafting your bag out of wrapping paper!