DIY Guide to Make a Gift Bag From Wrapping Paper
Finding the perfect gift bag can be surprisingly frustrating. Maybe you want something unique, eco-friendly, or just a little more personal. If that sounds familiar, you’re not alone—many people struggle to find gift bags that truly fit their style or values.
Luckily, making your own gift bags from wrapping paper is a fantastic way to solve this problem while adding a personal touch.
Making your own gift bags from wrapping paper is an easy and rewarding project. You can personalize the bag to match the recipient’s style while promoting eco-friendliness. Start by choosing a sturdy, colorful wrapping paper, then measure, cut, and fold it to create the bag.
Don’t forget to add handles and get creative with decorations! If you encounter challenges, there are simple solutions. Keep going to uncover tips and ideas that make your DIY gift bags even better!
Key Takeaways
- Choose wrapping paper based on the recipient’s taste and occasion, opting for eco-friendly or recycled options for sustainability.
- Measure and cut the paper accurately, allowing extra inches for folding to create a sturdy bag.
- Fold the sides towards the center, securing with double-sided tape or glue for a neat finish.
- Create custom handles using ribbons, twine, or fabric strips. Adjust their length based on the bag size.
- Personalize the bag with stamps, stickers, or custom tags to add a unique touch to your gift.
Why Make Your Own Gift Bags? Gather Your Materials
Creating your own gift bags can be a fun and creative way to personalize your presents. By making your own bags, you tap into endless personalization options, allowing you to match the design to the recipient’s taste. You can use colorful wrapping paper, unique patterns, or even recycled materials that reflect your style and thoughtfulness.
Plus, there are sustainability benefits to take into account. Crafting your gift bags from existing materials reduces waste and promotes eco-friendliness. You’re not just wrapping a gift; you’re making a statement about caring for the planet.
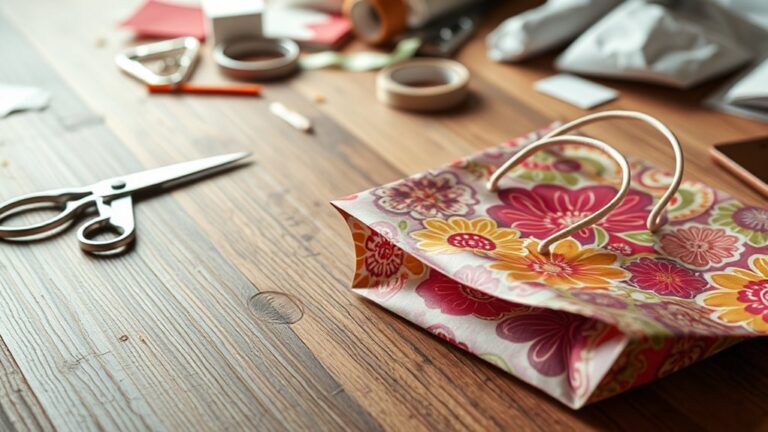
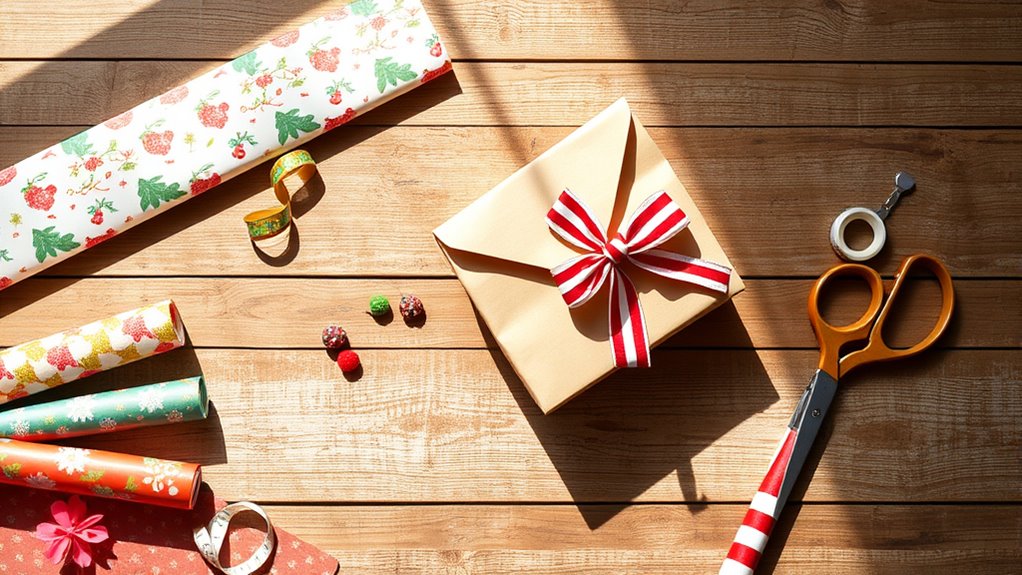
To get started, gather your materials: sturdy wrapping paper, scissors, tape, and decorative elements like ribbons or stickers. Choosing eco-friendly supplies improves both the look and the sustainability of your gift. So, let your creativity shine while being kind to the environment!
Select the Best Wrapping Paper for DIY Gift Bags
Choosing the right wrapping paper is key to crafting the perfect DIY gift bag. Start by considering your pattern preferences. Do you love bold prints or subtle designs? Think about the occasion and the recipient. Fun patterns might work for kids, while elegant designs are great for adults.
Next, investigate eco-friendly options. Many companies now offer recycled or sustainably sourced paper, which can add a thoughtful touch to your gift. Not only are you being creative, but you’re also making a positive impact on the environment.
When selecting your paper, also check its thickness. A sturdy paper holds shape better and prevents tearing. Keep an eye out for double-sided designs, giving you more versatility. By considering these factors, you’ll guarantee your DIY gift bag stands out and reflects your personal touch, making your gift even more special.
Measure and Cut Your Wrapping Paper for Perfect Size
To make the perfect DIY gift bag, first pick the right size for your bag. Once you’ve got your measurements down, it’s time to cut the wrapping paper to match. This way, your bag will look neat and hold your gift nice and secure.
Choose Bag Dimensions
When crafting your DIY gift bag, measuring and cutting your wrapping paper accurately is essential for a polished look. Start by determining the bag size you need. Here’s how to find the ideal dimensions:
- Decide on the Height: Think about how tall you want your bag to be based on the gift.
- Choose the Width: Measure the width of your gift and add extra space for a snug fit.
- Account for Depth: If you want a structured bag, add depth to hold the gift securely.
- Add Extra Inches: Always add a couple of inches to each dimension for folding and finishing touches.
Cut Wrapping Paper
Now that you’ve determined the dimensions for your gift bag, grab your scissors and cutting mat to measure and cut the wrapping paper accurately. Start by laying your paper flat, ensuring it’s smooth and wrinkle-free. Use a ruler to measure the required length and width, marking the spots with a pencil.
When you cut, follow straight lines for a clean edge. This’ll give your bag a polished look. Don’t hesitate to experiment with creative techniques, like layering multiple patterns or colors for a unique flair.
If you’re out of wrapping paper, consider material alternatives like fabric or old maps, which can add a special touch to your gift bag. Happy crafting!
Fold and Secure the Sides of Your Bag
Now that you’ve got your wrapping paper cut to size, it’s time to fold and secure the sides of your bag. Picking the right folding technique will not only add strength but also make your gift look even better.
Let’s check out some easy methods to get those sides just right!
Choose Your Paper Size
Choosing the right paper size is essential for creating a sturdy gift bag. The paper dimensions you select will determine the bag’s overall strength and capacity. Consider these size variations to find the perfect fit:
- Small (10×12 inches) Ideal for trinkets or small gifts.
- Medium (12×16 inches) Great for books or medium-sized items.
- Large (16×20 inches) Perfect for clothing or larger gifts.
- Extra Large (20×24 inches) Use for oversized items or multiple gifts.
Make sure to measure your gift before cutting the paper. This way, you’ll guarantee your bag not only looks good but can hold everything securely. With the right size, your DIY gift bag will impress!
Folding Techniques Explained
Once you’ve cut your paper to the desired size, it’s time to fold and secure the sides of your bag. Start by choosing a folding method that suits your paper type. Thicker papers like cardstock may need more precise folds, while thinner wrapping paper is easier to manipulate.
Fold each side towards the center, ensuring the edges align perfectly. You can create a straight crease by running your fingers along the fold. For added security, use double-sided tape or glue to hold the folds in place.
Once both sides are secured, you’ll have a sturdy foundation for your bag. Remember to check that the bottom is flat to support the weight of your gift. Now you’re ready for the next step!
How to Adjust Your Design for Different Bag Sizes?
When you’re crafting a DIY gift bag, adjusting your design for different bag sizes is essential to guarantee a perfect fit. Size variations can affect how your bag looks and functions, so some design adjustments are necessary.
Adjusting your design for different bag sizes is crucial for achieving a perfect fit and enhancing both appearance and functionality.
Here’s how to customize your bag effectively:
- Measure the Dimensions: Start by measuring your item to determine the bag size you need.
- Choose the Right Paper Size: Use a larger sheet for bigger bags; smaller items require less paper.
- Alter the Fold Lines: Adjust your fold lines based on the height and width of your bag for a neater finish.
- Modify the Handles: For larger bags, make longer handles for easier carrying. Shorter handles work for smaller bags.
Create the Bottom of Your Gift Bag
To create a sturdy bottom for your gift bag, start by folding the base of your wrapping paper with precision. Measure about two inches up from the bottom edge and make a clean fold. This folding technique establishes a solid foundation.
Next, fold the corners in towards the center and create triangular flaps. This step is essential for ensuring stability.
Now, secure the edges by using tape or glue to hold everything in place. Make sure you’re reinforcing those folds; you don’t want your bag to fall apart.
After securing, you can flip the bag upright and test its sturdiness. If the bottom feels secure, you’re in great shape. If it feels a bit flimsy, consider adding a piece of cardboard inside for added support.
With a sturdy base, your gift bag is ready to hold your special treats!
Attach Custom Handles for a Personal Touch
Adding custom handles not only improves the aesthetic of your gift bag, but it also makes carrying it a breeze. You can personalize your handles with various custom designs and handle materials to match the occasion. Here’s how to create your unique handles:
- Ribbons: Use colorful ribbons for a fanciful touch. They’re easy to tie and can be adjusted for length.
- Twine: For a rustic vibe, opt for twine. It adds charm and pairs well with natural-themed gifts.
- Fabric Strips: Cut strips of fabric for a soft, textured handle. This adds a cozy feel to your bag.
- Paper Straws: If you want a playful look, paper straws are lightweight and come in various colors and patterns.
Once you’ve chosen your materials, attach them securely to the bag, making sure they’re strong enough to hold your gift. Enjoy your personalized creation!
How to Decorate Your DIY Gift Bags?
Now that you’ve got your DIY gift bags ready, it’s time to make them pop with decoration. You can go for stamps and inks to create a unique design that really stands out. Or, if you like something a bit more charming, try adding ribbons and twine—it gives such a lovely touch.
And hey, don’t forget about stickers and tags! They’re perfect for personalizing each bag and making them feel extra special. Have fun mixing and matching to find your own style!
Use Stamps and Inks
Transform your DIY gift bags into personalized treasures with stamps and inks. By using various stamping techniques, you can create unique designs that reflect your style. Experiment with different ink types to achieve eye-catching results.
Here’s how to get started:
- Choose Your Stamps: Select designs that match the occasion, like floral for birthdays or festive for holidays.
- Pick Your Inks: Opt for vibrant colors or metallics to make your stamps pop.
- Layer Your Stamps: Use multiple stamps in varying sizes for depth and interest.
- Test First: Always practice on scrap paper to perfect your technique before stamping on your gift bag.
With these tips, your gift bags will truly stand out!
Add Ribbons and Twine
Stamps and inks can improve your DIY gift bags, but ribbons and twine take them to the next level. To boost your bags, choose from various ribbon types. Satin, grosgrain, or sheer can add a touch of elegance. Experiment with twine colors. Natural jute or vibrant bakers’ twine can create a charming contrast.
Start by cutting a length of ribbon that’s long enough to tie a bow, then wrap it around the bag’s handle or top. For a rustic look, use twine to secure your ribbon or create a simple knot. Layering different ribbon types or mixing twine colors can also add visual interest. Remember, the right finishing touches can truly make your gift bag stand out!
Incorporate Stickers and Tags
Boost your DIY gift bags by incorporating stickers and tags for a personalized touch. These elements not only add flair but also convey your thoughtfulness. Here’s how to do it effectively:
- Choose Fun Stickers: Opt for stickers that match the occasion or the recipient’s personality.
- Plan Sticker Placement: Arrange your stickers thoughtfully to create visual balance. Consider corners or around the bag’s opening.
- Create Custom Tags: Design tags using cardstock or decorative paper, adding a heartfelt message.
- Use Coordinating Colors: Make sure your tag design complements the wrapping paper and stickers for a cohesive look.
With these tips, your DIY gift bags will stand out and feel extra special!
Common Challenges When Making Gift Bags and How to Fix Them
While making your own gift bags can be a fun and creative project, you might run into a few common challenges along the way. One of the problems encountered is measurement issues; always double-check your dimensions to guarantee the bag fits your gift.
Creating your own gift bags is enjoyable, but remember to double-check measurements to ensure a perfect fit for your gifts.
If you face design flaws, consider using templates or sketching your ideas first. Material choice is essential. Opt for sturdier wrapping paper to avoid tearing.
Folding mistakes can lead to awkward shapes; practice your folds before committing. If you find decoration challenges, try simple embellishments like ribbons or stickers to improve the look without overwhelming it.
Finally, if the bag isn’t quite the right size, don’t hesitate to make size adjustments by trimming or adding panels. By addressing these issues with creative solutions, you’ll create beautiful gift bags that impress!
Why DIY Gift Bags Are Good for the Planet
Creating DIY gift bags not only showcases your creativity but also makes a positive impact on the environment. By opting for this approach, you adopt sustainable practices that help reduce waste.
Here are four reasons why DIY gift bags are eco-friendly:
- Reduced Waste: You’re repurposing materials like wrapping paper, minimizing landfill contributions.
- Eco-Friendly Materials: You can choose to use recycled or biodegradable materials, ensuring a lower carbon footprint.
- Personal Touch: Customizing your bags adds a unique flair, making your gifts even more special.
- Cost-Effective: Creating your own bags saves money while promoting sustainable habits.
Frequently Asked Questions
Can I Reuse Old Wrapping Paper for DIY Gift Bags?
Absolutely, you can reuse old wrapping paper for DIY gift bags! It’s a fantastic way to practice creative reuse and adopt sustainable gifting.
Just cut the paper to your desired size, fold it into a bag shape, and secure it with tape or glue. You’ll not only save money, but you’ll also give a second life to materials that might otherwise end up in the trash.
Your friends will love the personal touch!
What Type of Adhesive Works Best for Gift Bags?
Regarding making gift bags, strong adhesive types like hot glue or double-sided tape work best for securing gift bag materials. Many folks swear by craft glue, but it can take longer to dry and may not hold as well.
If you want a quick and sturdy option, hot glue’s your friend. Just make sure you use it carefully to avoid burns, and you’ll have a perfect gift bag in no time!
How Do I Choose a Theme for My Gift Bag?
To choose a theme for your gift bag, start by considering the occasion specifics. Think about the event, like birthdays, holidays, or weddings, and select a color scheme that fits.
For a cheerful birthday, bright colors work well, while soft pastels might suit a baby shower. Incorporate elements like patterns or images related to the event. And don’t forget to personalize it with a thoughtful touch. This’ll make your gift bag truly special!
Are There Eco-Friendly Wrapping Paper Options Available?
Absolutely, you’re in luck! Eco-friendly wrapping paper options abound, like treasures waiting to be uncovered. Look for recycled paper, which breathes new life into the old, or choose beautifully crafted sheets from sustainable sources that tread lightly on our planet.
These choices not only wrap your gifts in elegance but also wrap the Earth in care. So, go ahead, make your presents shine while staying green and guilt-free!
Can Children Help With Making DIY Gift Bags?
Absolutely, kids can help with making DIY gift bags! It’s a great way to engage them in fun activities while sparking their creativity.
You can encourage them to come up with creative designs using colorful wrapping paper, stickers, or drawings. Let them cut, fold, and decorate the bags, turning it into a memorable craft session.
Their unique touches will make each bag special, and you’ll create lasting memories together!
Conclusion
Creating your own gift bags not only adds a personal touch but also transforms simple materials into something special. While store-bought bags can feel generic, your DIY creations can reflect your unique style and care.
By investing a little time and creativity, you’re not just crafting; you’re making memories and reducing waste. So, as you wrap your gifts in love and thoughtfulness, keep in mind that every bag you create is a step toward a more sustainable future with your DIY gift bag from wrapping paper.