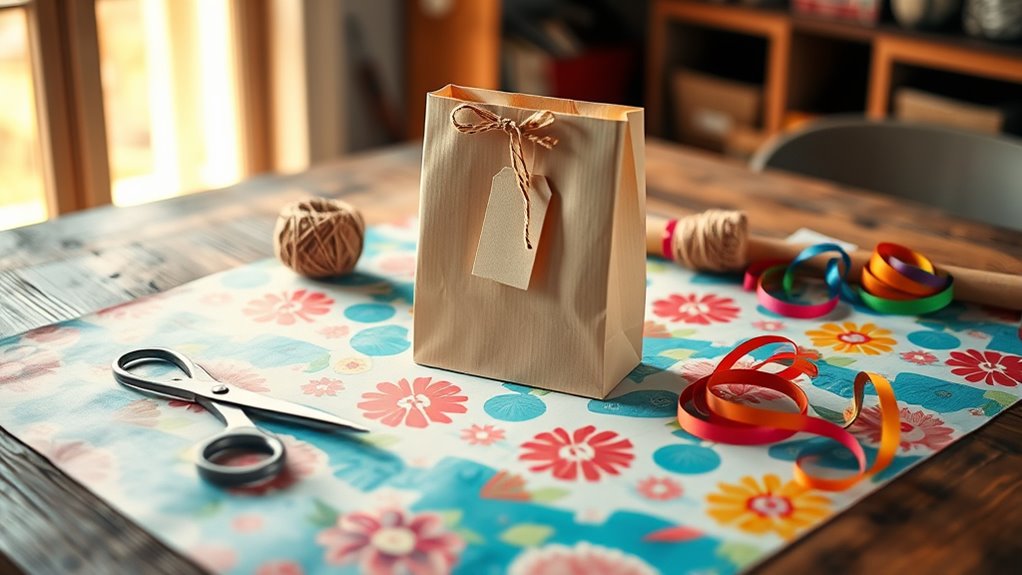
DIY Guide to Make a Gift Bag Out of Wrapping Paper
Struggling to find the perfect gift bag that’s both stylish and budget-friendly? You’re not alone. Many people wish for a personalized touch without spending a fortune on store-bought bags.
Luckily, creating a DIY gift bag out of wrapping paper is a fantastic solution that anyone can try.
Creating a DIY gift bag out of wrapping paper is easy and fun! Start by gathering your materials, including scissors and tape. Measure and cut your paper based on your gift’s size, then fold and secure the bottom to guarantee it holds.
Add personal touches like ribbons or stickers, and consider various styles for a unique flair. Avoid common mistakes, and customize your bag for special events.
Keep going to find more creative tips and tricks!
Key Takeaways
- Measure the item’s dimensions and add seam allowances before cutting the wrapping paper for the perfect fit.
- Fold the bottom of the paper, securing the flaps with tape or glue to create a sturdy base.
- Personalize the bag with embellishments like ribbons, tags, or decorative elements for a unique touch.
- Choose handle options such as fabric or twine for a comfortable and stylish carrying solution.
- Avoid common mistakes like misjudging sizes and neglecting to reinforce the bag’s bottom for durability.
Gather Your Materials for Gift Bag Creation
To create the perfect DIY gift bag, you’ll need to gather a few essential materials. Start with creative paper choices like wrapping paper, old maps, or even newspaper. Opt for eco-friendly options if you’re looking to be sustainable.
Next, select practical crafting tools such as scissors, tape, and a ruler. Consider gift bag sizes based on what you’re planning to wrap, making sure they fit your items comfortably.
Embrace seasonal themes to make your gift bags more festive. Holiday motifs or spring florals can add a special touch.
Keep in mind some quick assembly tips, like folding the paper neatly and securing it well. Finally, avoid common crafting mistakes like using too much tape or choosing flimsy materials.
Instead, focus on budget-friendly materials that won’t break the bank while still delivering a charming result. With these gathered, you’re ready to create something special!
Measure and Cut Your Wrapping Paper
Start by measuring your items to confirm your gift bag fits perfectly. Use accurate measuring techniques to make sure you have just the right dimensions. Here’s how you can do it:
- Width of the Item: Measure the widest part to determine the bag’s width.
- Height of the Item: Measure from the base to the top for the bag’s height.
- Depth of the Item: If it’s bulky, account for depth to guarantee it fits comfortably.
Once you have these measurements, add a couple of inches for seam allowances. Now, lay your wrapping paper flat and use a ruler or straight edge for cutting precision. Mark your dimensions lightly with a pencil, then cut carefully along the lines. This way, you’ll create a perfectly sized gift bag that looks polished and professional!
Fold and Secure the Bottom of Your Gift Bag
Now it’s time to fold and fasten the bottom of your gift bag. Start by positioning your paper with the patterned side facing down. Fold up the bottom edge about two inches to create a base. This is your first step in bottom folding.
Next, take the left and right flaps and fold them toward the center, overlapping them slightly. You’ll want to make sure they align evenly for a neat finish. Once aligned, use tape or glue to fasten the flaps in place. This step is essential for creating a sturdy base that can hold your gift.
After securing the flaps, flip the bag over and check for any gaps. If you see any, reinforce them with a bit more tape. With the bottom firmly fastened, your gift bag is ready for the next steps, so let’s keep going!
Folding Techniques for Gift Bag Sides
Creating the sides of your gift bag is an essential step that adds structure and style. To craft sturdy and visually appealing bag sides, you can employ a few effective folding techniques. Here’s how to do it:
- Pinch Fold: Start by pinching the top edges of the bag to create a clean fold. This helps define the bag’s shape and gives it a polished look.
- Accordion Fold: For a more dynamic design, use an accordion fold along the sides. This technique adds dimension and allows the bag to expand and hold more items.
- Tuck Fold: Finally, tuck the excess paper into the bag’s interior. This neatens the edges and secures the structure, ensuring your bag side looks professional.
Add Your Personal Touch With Fun Embellishments
Now that you’ve got the folding techniques down, it’s time to add your personal touch with some fun embellishments. You can pick out unique materials, personalize your bag with handwritten tags, or toss in playful decorative elements to make your gift bag stand out. Just let your creativity shine and customize each bag to perfectly fit the occasion!
Choose Unique Embellishment Materials
When you want to make your DIY gift bag stand out, choosing unique embellishment materials is key. Think about how unique textures and playful motifs can enhance your design. Here are three ideas to inspire you:
- Upcycled Materials: Use old fabric scraps or buttons for a creative, eco-friendly touch.
- Seasonal Themes: Incorporate elements like dried flowers for spring or mini pinecones for winter to match the occasion.
- Layering Styles: Experiment with different color combinations and layering techniques to add depth and interest.
Personalize With Handwritten Tags
Adding a personal touch to your DIY gift bag can elevate its charm, and handwritten tags are a perfect way to do just that. You can include heartfelt sentiments and unique messages that reflect your relationship with the recipient.
Think about adding handwritten quotes that resonate with special occasions or capture memorable memories you share. Use themed colors that match your gift bag’s design for a cohesive look.
Consider incorporating personal stories in your tags, making them even more special. Let your creativity flow with fun, creative designs that will catch the eye.
These thoughtful details transform a simple gift into a cherished keepsake, showing just how much you care.
Incorporate Fun Decorative Elements
A fun way to improve your DIY gift bag is by incorporating decorative elements that reflect your personality and style. Adding these embellishments not only elevates the bag but also makes it more memorable. Here are three ideas to get you started:
- Colorful Ribbons: Tie a vibrant ribbon around the handles or bow it on top for a pop of color.
- Seasonal Stickers: Choose stickers that match the occasion, like snowflakes for winter or flowers for spring, to add a festive touch.
- Personalized Doodles: Grab some markers and draw little designs or messages directly on the bag, making it distinctly yours.
These fun additions can turn a simple gift bag into a cherished keepsake!
How to Add Handles to Your Gift Bag?
Adding handles to your gift bag can really enhance its look and functionality. You’ll want to think about the types of handles available, how to attach them securely, and some decorative options that fit your style.
Let’s investigate how to make your gift bag both practical and eye-catching!
Types of Handles Available
While choosing the right handle for your DIY gift bag, you’ll find a variety of options that improve both functionality and aesthetics. Here are three popular choices:
- Fabric Handles: Made from reusable materials, these handles offer durability and comfort. You can customize the handle lengths to fit your bag perfectly.
- Ribbon Options: These add a touch of elegance and come in various colors and widths. They’re great for decorative placement, enhancing the overall look of your gift bag.
- Paper Handles: Simple yet effective, paper handles are eco-friendly and can be easily crafted from leftover wrapping paper. You can even use decorative cords for a unique twist!
Choose the one that best suits your style and needs!
Attaching Handles Securely
To guarantee your gift bag’s handles stay secure, it’s vital to attach them properly from the start. First, choose your handle materials. Ribbon, twine, or sturdy paper strips work well.
Next, use effective attachment techniques. For ribbon, create a secure knotting method that guarantees the handles won’t slip. If you opt for paper strips, punch holes on each side of the bag and thread the strips through, securing them with a knot inside.
After attaching the handles, perform strength testing by gently pulling on them to confirm they hold up. If you want to improve the look, consider adding decorative additions later, but keep in mind secure handles are your priority for a functional gift bag!
Decorative Handle Options
Decorative handles can improve your DIY gift bag, making it not only functional but also visually appealing. Here are three fantastic options to contemplate:
- Fabric Handles: Use sturdy fabric scraps for a soft touch. They’re perfect for color coordination with seasonal themes.
- Twine Options: For an eco-friendly choice, opt for jute or hemp twine. Twist it into handles for a rustic look.
- Beaded Accents: Add some flair by threading beads onto your handles. This embellishment idea gives a unique sparkle.
When selecting your handles, think about handle lengths to guarantee comfort and style. With these options, you can create a beautiful, personalized gift bag that stands out!
Gift Bag Tips for Using Leftover Wrapping Paper
If you’ve got leftover wrapping paper lying around, turning it into unique gift bags can be a fun and eco-friendly project. Start by measuring the size of your gift to guarantee your bag will fit perfectly. Cut the wrapping paper to your desired dimensions, leaving extra for folding and sealing.
For added gift bag sustainability, use double-sided tape or glue to secure the edges rather than staples, which can be less eco-friendly. Get creative with your wrapping! Mix and match different patterns or colors to make your bag stand out.
You can also personalize it by adding a little note or a decorative element like ribbons or stickers. If you have leftover scraps, use them for accents or tags. This way, you’re not only wrapping a gift but also embracing the joy of creative wrapping while being kind to the planet. Happy crafting!
Different Styles of Custom Gift Bags
While exploring different styles of custom gift bags, you’ll find endless possibilities that can improve your gifting experience. Choose a style that reflects your personality or the occasion. Here are three popular options:
- Seasonal Themes: Welcome vibrant colors and creative patterns that celebrate holidays or events, like floral designs for spring or cozy prints for winter.
- Minimalist Styles: Opt for sleek lines and textured finishes that exude elegance. Simple, eco-friendly options often use recycled materials, making them both stylish and sustainable.
- Artistic Techniques: Get crafty with unique designs that showcase your artistic flair. You can incorporate hand-painted elements or mixed media for a truly one-of-a-kind bag.
These styles not only uplift your gift but also make a lasting impression. So, release your creativity and choose a design that resonates!
Top Mistakes to Avoid in Gift Bag Crafting
When you’re crafting a gift bag, overlooking important details can lead to disappointment. One of the most common crafting errors is misjudging the size of your wrapping paper. If it’s too small, you’ll end up with an awkward fit, while too much can waste materials.
Another frequent mistake is not reinforcing the bag’s bottom. A flimsy base can collapse under the weight, ruining your thoughtful gift presentation.
A sturdy base is essential; a weak bottom can ruin your beautifully wrapped gift.
Don’t forget about handles! Omitting them or using weak materials can make carrying the bag difficult.
Additionally, be mindful of the pattern orientation. If you’re using printed paper, make sure it looks good from all angles.
Finally, skip the last-minute rush. Planning ahead helps you avoid common gift bag mistakes, ensuring your creation is both functional and beautiful. Taking your time pays off, so enjoy the process!
Customizing Gift Bags for Special Events
When you’re customizing gift bags for special events, choosing themed wrapping paper can really set the tone. It’s amazing how a simple pattern or color can make everything feel more festive. Plus, you can personalize each bag with unique embellishments that reflect the occasion. Think ribbons, tags, or little charms that add that special touch. Let’s take a closer look at how these simple touches can make your gifts unforgettable.
Choosing Themed Wrapping Paper
Choosing the right themed wrapping paper can improve your gift bag and make any occasion feel special. By selecting the perfect design, you can reflect the essence of the event. Consider these options:
- Festive Patterns: Look for cheerful prints like snowflakes for winter or flowers for spring. These capture seasonal motifs.
- Color Palettes: Choose colors that align with occasion themes, such as pastels for baby showers or vibrant hues for birthdays.
- Texture Choices: Examine various textures, like glossy finishes or matte surfaces, to add depth and interest to your gift bag.
Using these themed designs and artistic techniques, you’ll create a memorable presentation that resonates with the recipient and raises your gift-giving experience. Happy wrapping!
Personalizing With Embellishments
Adding personal touches to your gift bags can improve any event and make your gifts truly memorable. To customize your bags, investigate various embellishment techniques that reflect the occasion. For birthdays, consider adding colorful ribbons or themed stickers.
For weddings, delicate lace or metallic accents can create an elegant look. Using creative materials like washi tape, fabric scraps, or even dried flowers can uplift your design. You might also write a heartfelt note or attach a personalized tag to give it that special touch.
Don’t shy away from mixing textures and colors; this adds depth and uniqueness. By incorporating these elements, you’ll create gift bags that not only look fantastic but also convey your thoughtfulness.
Frequently Asked Questions
Can I Use Recycled Wrapping Paper for This Project?
Absolutely, you can use recycled wrapping paper for this project! Not only does it promote sustainability, but it also offers creative repurposing opportunities.
By choosing recycled paper, you’re reducing waste and giving your gift a unique touch. You can personalize it with stamps or drawings, making each bag special.
Plus, using recycled materials shows you care about the environment, making your gift even more meaningful. So go ahead and get crafty!
What Types of Wrapping Paper Work Best for Gift Bags?
Bright, colorful wrapping paper with bold patterns works best for gift bags, symbolizing joy and celebration. You’ll want designs that catch the eye, like florals or geometric shapes, enhancing your gift’s charm.
For wrapping techniques, consider using thicker paper for sturdiness, ensuring your bag holds up. Avoid flimsy materials that might tear easily.
Ultimately, choose wrapping paper that resonates with the occasion’s spirit, making your gift bag truly special and memorable.
How Do I Store Leftover Wrapping Paper Efficiently?
To store leftover wrapping paper efficiently, you can use a gift storage box or a large, sturdy tube. Roll the paper neatly and secure it with a rubber band to prevent creasing.
If you have multiple types, categorize them by color or pattern for easy access. You might also consider vertical storage solutions, like hanging organizers, which make paper organization a breeze and keep everything tidy and accessible when you need it.
Can I Use Fabric Instead of Wrapping Paper?
Absolutely, you can use fabric instead of wrapping paper! Picture vibrant cottons, soft silks, or cozy flannels wrapping your gifts.
With simple sewing techniques, you can create a stunning fabric bag that adds a personal touch. Just cut the fabric to size, stitch the edges, and voila! You’ve transformed a piece of cloth into a beautiful presentation.
Plus, it’s reusable, making your gift even more special and eco-friendly.
What Are Some Eco-Friendly Alternatives to Traditional Wrapping Paper?
You can definitely investigate eco-friendly alternatives to traditional wrapping paper! Biodegradable options like recycled paper or plant-based wraps are great choices.
You might also consider newspaper alternatives, which add a unique touch and can be easily customized with designs or stamps. Using fabric scraps or even old maps can make your gifts stand out while being kind to the planet.
These options not only look good but also reduce waste!
Conclusion
Now that you’ve mastered the art of crafting your own gift bag, imagine the delighted surprise on your loved one’s face as they unwrap your thoughtful creation. You’ve not just saved money; you’ve added a personal touch that store-bought bags can’t match.
But wait, there’s more! What if you could enhance your bag to an entirely new level? Stay tuned for some exciting ideas that could transform your gift-giving game forever.
The best is yet to come when it comes to making a gift bag out of wrapping paper!