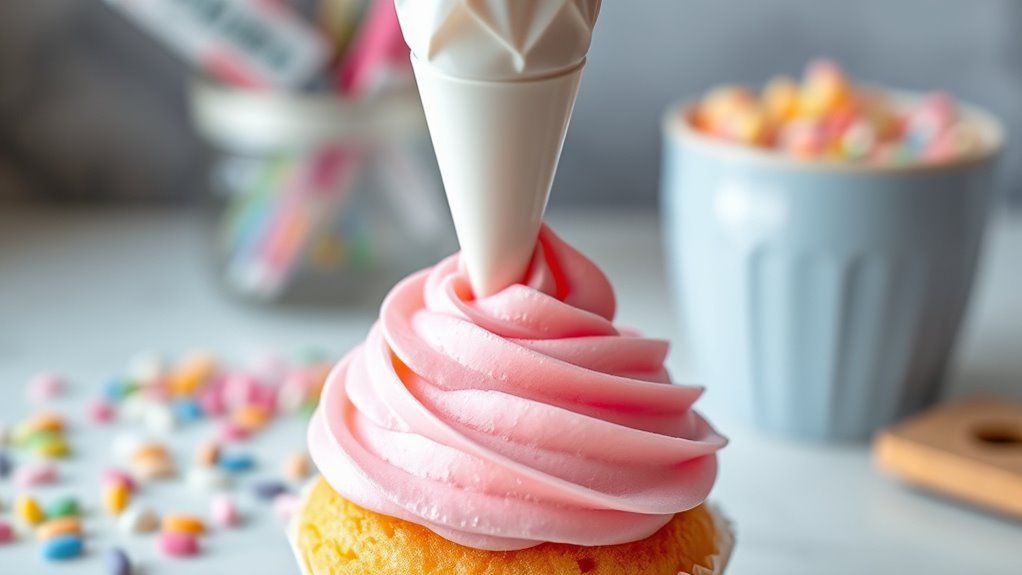
How to Use an Icing Piping Bag?
If you’ve ever tried decorating a cake or cupcakes and ended up with messy, uneven icing, you’re not alone. Many people struggle with getting that perfect, professional-looking finish.
It’s frustrating when your creativity doesn’t translate onto your baked goods the way you imagined.
To use an icing piping bag effectively, start by choosing the right bag and tip for your project. Fill the bag about two-thirds full, twisting the top to seal it.
Hold the bag in your dominant hand and support the base with your other hand for stability. Keep the bag at a 45-degree angle and apply steady pressure for smooth icing flow.
Practice makes perfect, and there are plenty of tips and techniques to improve your decorating skills.
Key Takeaways
- Choose the right size and type of piping bag for your project to ensure optimal control and comfort while decorating.
- Fill the bag two-thirds full and twist the top to seal it. This keeps air out and helps the icing flow better.
- Keep the bag at a 45-degree angle while piping. Apply steady pressure for smooth and consistent icing.
- Practice your piping technique on parchment paper first. This helps you adjust pressure and flow before decorating your cake.
- Clean and maintain your piping supplies regularly. It ensures they last longer and makes decorating easier.
Essential Tools and Supplies for Successful Piping
When you’re ready to start piping, having the right tools and supplies makes all the difference. First, grab a high-quality piping bag; it should be sturdy and easy to handle. Next, choose your tips wisely. Different shapes create unique designs. Don’t forget to have couplers on hand. They let you switch tips without changing bags.
For a smooth piping experience, consider using a pair of scissors to trim the bag and a spatula for mixing your icing. Icing bag accessories like a decorating turntable can help you achieve more precise designs.
Lastly, keep a damp cloth nearby for quick clean-ups. With these piping bag essentials, you’ll be set to create beautiful decorations that wow everyone. Having all these tools at your fingertips makes the process smoother and more enjoyable, ensuring your piping turns out just as you envisioned.
Choosing the Right Icing Piping Bag for Your Needs
When you’re picking out an icing piping bag, it’s really important to think about both the material and the size that will work best for you. Different materials come with their own perks, and getting the right size can totally change how precise your decorating turns out. So, let’s take a closer look at how to choose the perfect piping bag for your projects.
Material Types Comparison
Choosing the right icing piping bag can greatly impact your decorating experience, especially since different materials offer unique benefits. Silicone bags are flexible and allow for easy cleaning, making them a durable choice.
Disposable bags are convenient for quick projects, but they’re not eco-friendly. If you’re looking for sustainability, consider reusable fabric bags; they’re sturdy and can be washed multiple times.
Plastic bags are another option, often used for their affordability, but they may not hold up as well over time. Each type has its pros and cons, so think about your decorating needs and preferences.
Size Considerations Explained
Selecting the right size icing piping bag is essential for achieving precise and efficient decorating results. The size of your piping bag can greatly affect your icing consistency and overall decorating experience.
Here are some key considerations:
- Small (10-12 inches): Ideal for detailed work and intricate designs, like flowers or writing.
- Medium (12-16 inches): Great for general use, accommodating various icing consistencies without being too bulky.
- Large (16-20 inches): Perfect for filling cakes or larger projects, allowing for more icing at once.
- Extra-Large (20+ inches): Best for commercial use or heavy-duty projects, handling thick icing with ease.
Choosing the right piping bag size guarantees you have the control you need to create beautiful decorations.
How to Fill Your Icing Piping Bag Like a Pro
Filling your icing piping bag like a pro can make all the difference in your decorating results. Start by choosing the right size piping bag for your needs. Place the bag in a tall glass or container to keep it steady while you fill it.
Use a spatula to scoop your icing into the bag, ensuring you don’t overfill it. About two-thirds full is perfect. This allows for better icing flow control, giving you the precision you need.
Twist the top of the bag to seal it, which also prevents air from getting in. To improve your piping bag techniques, gently squeeze the bag from the top downwards, pushing the icing toward the tip.
Remember to practice on a piece of parchment paper before you start decorating so you can adjust your pressure and get comfortable with the flow. Happy decorating!
How to Grip Your Piping Bag for Precision
To get precise with your piping bag, first make sure your hands are in the right spot. You want to hold the bag firmly, but not so tight that it’s hard to control the pressure.
Once you find that sweet spot, it’s all about practice. You’ll soon get the hang of balancing your grip and the flow, making it easier to create beautiful designs without much effort.
Proper Hand Positioning
While mastering the art of icing, proper hand positioning is essential for achieving precision and control with your piping bag. Good hand stability allows you to execute various piping techniques flawlessly. Here’s how to grip your piping bag:
- Hold the bag: Grip the top of the bag with your dominant hand, forming a loose fist.
- Support the base: Use your other hand to support the bottom, keeping it steady.
- Angle it right: Tilt the bag at a 45-degree angle to your surface for even flow.
- Practice control: Keep your grip firm but relaxed, allowing for fluid movement while maintaining stability.
With these tips, you’ll improve your piping skills and create beautiful designs effortlessly.
Pressure Control Techniques
Achieving the right pressure with your piping bag is key to creating those intricate designs you envision. Start by gripping the bag firmly but not too tightly, holding it near the bottom to control the piping pressure effectively. Use your dominant hand to squeeze while your other hand guides the tip. This balance allows for precision in your designs.
Practice different techniques, like varying your grip or adjusting your finger pressure, to find what works best for you. Remember, technique practice is essential; it helps you learn how much pressure you need for different effects. With time, you’ll master the art of controlling your piping pressure, making your decorations both beautiful and effortless.
Techniques for Precise Icing Flow
Mastering precise icing flow requires a solid grip on your piping bag and the right techniques. You’ll want to focus on your piping speed and guarantee you achieve the ideal icing consistency.
Here are four essential techniques to help you:
- Angle Your Bag: Hold your piping bag at a 45-degree angle. This position allows for better control over the flow of icing.
- Steady Pressure: Apply even pressure on the bag. This consistency in pressure will help maintain a smooth flow.
- Practice Control: Start with short bursts of icing. Gradually increase your piping speed as you gain confidence and control.
- Adjust Icing Consistency: If your icing flows too quickly or slowly, tweak its consistency. Thicker icing flows slower, while thinner icing flows faster.
Which Icing Tips Should You Use?
Choosing the right icing tip can make all the difference in your decorating. You’ll want to check out common icing tip types and see which size fits your project best.
Let’s dive in and find the perfect tip for your needs!
Common Icing Tip Types
In relation to decorating with an icing piping bag, selecting the right icing tips can make all the difference. Here are some common icing tip types that you should take into account:
- Star Tips: Perfect for creating rosettes and borders. These tips add texture and flair.
- Leaf Tips: Ideal for making realistic leaves, giving your designs a natural look.
- Round Tips: Great for writing and dots. These versatile tips are a must-have for any decorator.
- Petal Tips: Used for flowers, these tips help create delicate petals and intricate designs.
You might also encounter basketweave tips and specialty tips for unique effects. Don’t forget to take into account coupler types and tip sizes to improve your decorating experience!
Selecting The Right Size
It’s also essential to match the icing flow consistency with the tip size. Thicker icing requires a larger tip to flow properly, while thinner icing can be managed with smaller tips.
Experimenting with different sizes helps you find the perfect combination for your project, ensuring that your decorations turn out exactly as you envision them.
Unique Icing Piping Techniques for Beautiful Cake Designs
Mastering unique icing piping techniques can improve your cake designs to a whole new level. Here are four impressive methods to try:
- Swirling Roses: Create stunning floral designs by piping swirling roses. Use a star tip for a professional look.
- Intricate Lace: Employ stencil techniques to achieve delicate lace patterns, adding elegance to your cakes.
- Ombre Effects: Blend colors smoothly to craft beautiful ombre effects. This technique gives depth and dimension to your designs.
- Playful Shapes: Experiment with bold patterns and playful shapes, perfect for themed decorations that bring your cake to life.
These techniques allow you to explore layered designs and textured finishes, transforming simple borders into eye-catching elements. By incorporating these methods, your cakes will not only taste great but also look stunning!
Troubleshooting Common Piping Challenges
Even with all the creativity from unique icing piping techniques, you might encounter some common challenges that can affect your results. Here are a few issues and how to troubleshoot them:
| Challenge | Solution |
|---|---|
| Piping bag leaks | Verify the tip is securely attached; check for any holes in the bag. |
| Uneven icing distribution | Apply consistent pressure and maintain a steady hand while piping. |
| Clogged piping tip | Use warm water to loosen the icing or switch to a larger tip. |
| Poor icing consistency | Adjust the icing with a little water or powdered sugar for the right texture. |
| Air bubbles | Mix the icing gently to remove air before filling the bag. |
Tips for Cleaning and Maintaining Your Piping Supplies
Maintaining your piping supplies is essential for achieving the best results in your decorating projects. Regular cleaning and proper organization not only extend the life of your tools but also improve your decorating experience. Here are some effective tips to help you:
- Use Cleaning Techniques: Rinse your piping bags and tips immediately after use to prevent drying icing from hardening.
- Follow Maintenance Tips: Inspect your supplies regularly for wear and tear, replacing any damaged items to guarantee consistent results.
- Implement Storage Solutions: Keep your piping bags and tips in a dedicated drawer or container to prevent tangling and damage.
- Prioritize Supply Organization: Label your tools and ingredients to make them easily accessible, saving you time during your decorating sessions.
With these strategies, you’ll keep your piping supplies in top shape, making your decorating projects smoother and more enjoyable.
Inspiring Cake Decorating Project Ideas to Try
Whether you’re a beginner or a seasoned pro, diving into cake decorating can be incredibly rewarding and fun. If you’re looking for cake design inspiration, consider trying a themed cake that reflects your favorite season or holiday. Think vibrant flowers for spring or cozy colors for autumn.
Experiment with creative color combinations to make your cake pop. For instance, a pastel palette can create a soft, elegant look, while bold, bright hues can energize any dessert table.
You might also try a tiered cake with different textures like smooth fondant, ruffled buttercream, or even a marbled effect.
Don’t forget about incorporating fun elements like edible glitter or fresh fruit to add a unique touch.
Whatever you choose, let your imagination run wild and enjoy the process of bringing your cake vision to life. Happy decorating!
Frequently Asked Questions
Can I Use a Regular Plastic Bag Instead of a Piping Bag?
Yes, you can use a regular plastic bag as a piping bag alternative! Just fill it with icing, seal it tightly, and snip a corner to create a makeshift tip.
While it’s not as sturdy as a proper piping bag, it’ll work in a pinch. Experiment with piping bag techniques to achieve different designs, but remember to control the pressure to avoid any messy spills. Happy decorating!
How Can I Store Leftover Icing in My Piping Bag?
To store leftover icing in your piping bag, simply seal the bag tightly to prevent air from getting in. You can place it in the refrigerator for up to a week.
When you’re ready to use it again, let it come to room temperature and knead it gently. For proper piping bag maintenance, clean your bag thoroughly after each use to guarantee your icing stays fresh and free from contaminants.
What Types of Icing Work Best With Piping Bags?
In terms of icing, buttercream varieties and royal icing reign supreme! You’ll find buttercream perfect for swirls and intricate designs, while royal icing hardens beautifully for detailed decorations.
Both types offer incredible versatility, whether you’re creating a cake masterpiece or adorning cookies. For the best results, make sure your icing is the right consistency; it’ll flow smoothly through your piping bag, bringing your sweetest creations to life!
Is It Safe to Use Piping Bags for Hot Ingredients?
It’s not safe to use piping bags for hot ingredients. Most piping bag materials, like plastic and silicone, can’t withstand high temperatures and might melt or warp. This could lead to leaks and potential burns.
Instead, let your hot ingredients cool down before transferring them into the piping bag. Prioritizing hot ingredient safety guarantees you avoid accidents while decorating your baked goods.
Always check the manufacturer’s guidelines for temperature limits.
How Do I Prevent Icing From Leaking Out of the Bag?
Imagine trying to keep water in a leaky bucket; it’s frustrating! To prevent icing from leaking out of your piping bag, make certain your icing consistency is just right—not too runny.
Start by sealing the bag tightly at the top, applying pressure while you pipe. If you’re using a coupler, confirm it’s secure.
Trust me, with these steps, you’ll keep your creations mess-free and looking beautiful!
Conclusion
As you master the art of using an icing piping bag, think of it as wielding a paintbrush, transforming blank canvases into delicious masterpieces. Each swirl and line you create symbolizes your unique flair and creativity.
With practice, those once intimidating challenges will turn into delightful experiences, just like a well-formed rose blooming in spring. So, welcome the journey, let your imagination flow, and watch as your cakes come alive with flavor and beauty using an icing piping bag.