DIY Ice Cream: Make Ice With a Bag of Ice in 7 Steps
Craving homemade ice cream but worried it’s too complicated or requires fancy equipment? You’re not alone—many people struggle with finding easy, fun ways to make creamy ice cream right at home.
Luckily, making DIY ice cream with just a bag of ice is a simple solution that anyone can try.
Making DIY ice cream with just a bag of ice is easy and fun! You’ll mix heavy cream, whole milk, sugar, and vanilla in a bowl for a creamy base.
Then, layer ice and salt in a larger bag to chill the mixture. Stir the ice cream every 15-20 minutes to get the perfect texture.
Finally, scoop it out and top with your favorite ingredients. Keep going to uncover more tips for the best homemade ice cream!
Key Takeaways
- Combine heavy cream, whole milk, sugar, and vanilla extract to create a smooth ice cream base.
- Layer ice and salt in a large bag to chill the mixture effectively during freezing.
- Keep the ingredient ratios right for the best texture and flavor balance in your ice cream.
- Stir the mixture every 15-20 minutes to break up ice crystals and help it freeze evenly.
- Serve with an ice cream scoop and add your favorite toppings for a delightful finish.
What You Need to Get Started: Ingredients and Supplies
To kick off your DIY ice cream adventure, you’ll need a few essential ingredients and supplies. First, gather the basic ice cream ingredients: heavy cream, whole milk, sugar, and vanilla extract. You can also add your favorite flavors or mix-ins, like chocolate chips or fruit, to customize your treat.
Next, you’ll need some essential supplies. Grab a mixing bowl and a whisk or an electric mixer for blending your base. A measuring cup and spoons will help you get the quantities just right. Don’t forget a freezer-safe container to store your ice cream once it’s ready.
If you’re using the bag method, you’ll also need a large resealable plastic bag for ice and salt. With these ingredients and supplies in hand, you’re all set to start creating your delicious homemade ice cream! Enjoy the process and get ready for a sweet reward!
Step 1: Prepare Your Ice Cream Mixture
Start by combining your heavy cream, whole milk, sugar, and vanilla extract in a mixing bowl. This simple yet essential step is the foundation of your ice cream. As you mix, think about ice cream history, how this beloved treat has evolved from ancient frozen desserts to the creamy delight we enjoy today.
Stir the mixture until the sugar dissolves completely. This guarantees a smooth texture, enhancing the homemade benefits of your ice cream. Unlike store-bought options, your creation will be free of artificial additives and preservatives, allowing you to enjoy a purer flavor.
Once everything’s well blended, taste it! Adjust the sweetness if needed. This is your chance to customize your ice cream before it hits the ice. Remember, the quality of your ingredients makes all the difference, so use the best you can find. You’re one step closer to a delicious homemade treat!
Step 2: Choose Flavor Combinations for Your Ice Cream
Now that your ice cream mixture is ready, it’s time to get creative with flavors. Choosing unique flavor pairings can really enhance your homemade treat. Think about using seasonal ingredients for the freshest taste.
Here are three ideas to inspire you:
- Strawberry Basil: The sweetness of strawberries combined with the herbal note of basil creates a revitalizing twist.
- Peach Ginger: Ripe peaches meld beautifully with spicy ginger, perfect for summer.
- Chocolate Chili: Combine rich chocolate with a hint of chili for a surprising kick that tantalizes your taste buds.
Feel free to mix and match! Don’t shy away from experimenting with different combinations. Whether you’re craving something fruity, spicy, or indulgent, the possibilities are endless. Let your creativity shine and enjoy the process of crafting your dream ice cream flavor!
Step 3: Pack Your Ingredients
As you prepare to create your ice cream masterpiece, organizing your ingredients is essential for a smooth process. Start by gathering your chosen flavors and ensuring you have all necessary components, like cream, sugar, and any mix-ins.
Pay close attention to ingredient ratios; they play a vital role in achieving the perfect texture and taste. Too much sugar can make your ice cream overly sweet, while not enough can affect flavor extraction.
Once you’ve measured everything, pack your ingredients in a way that keeps them accessible. You might want to use small containers or resealable bags for easy handling. This not only saves time but also helps maintain the integrity of your flavors.
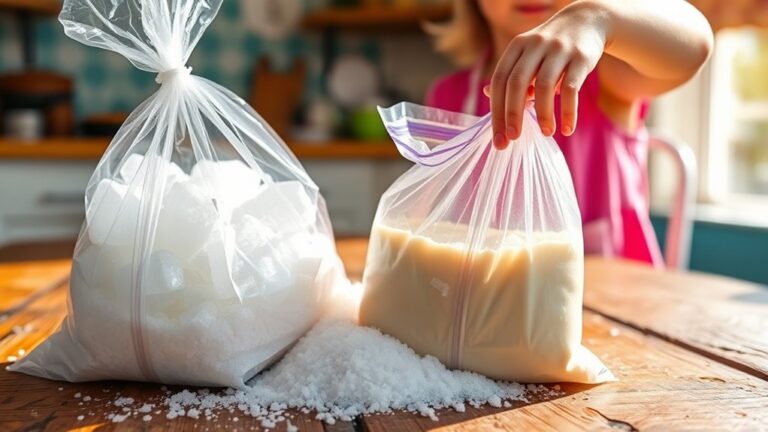
Step 4: Layer Ice and Salt in a Larger Bag
To create the perfect chilling environment for your ice cream, layer ice and salt in a larger bag. This combination lowers the temperature effectively, ensuring your mixture freezes properly. Here’s how to do it:
- Choose your ice types: Use crushed ice for faster cooling or larger ice cubes for longer-lasting chill.
- Measure your salt ratios: Aim for about 1 cup of salt for every 3 cups of ice. This balance enhances the freezing effect.
- Layer it right: Start with a layer of ice at the bottom, sprinkle salt evenly, and repeat until the bag is nearly full.
Once you’ve prepared your ice and salt layers, you’ll set the stage for an ideal freezing experience. This step is essential to achieving that creamy, delightful texture you crave in homemade ice cream.
Step 5: Ice Cream Mixing Techniques for Perfect Texture
How can you achieve that perfect, creamy texture in your homemade ice cream? It all comes down to effective mixing techniques. Start by whisking your base ingredients vigorously to incorporate air, which creates a light and fluffy texture.
Achieving that perfect creamy texture in homemade ice cream starts with vigorous whisking to incorporate air and create lightness.
If you’re using a blender, pulse it gently to avoid over-mixing. This helps maintain that desired consistency.
Once your mixture is ready, pour it into your ice-filled bag. As you shake the bag, the ice works its magic, freezing the mixture while continuing to mix it. This constant movement is essential for texture improvement and prevents ice crystals from forming.
After about 10-15 minutes of shaking, check the texture. If it’s too soft, keep mixing until it thickens to your liking. Remember, patience is key. Good ice cream takes time, but the results are worth it! Enjoy your creamy creation!
Step 6: Check on Your Ice Cream Consistently
During the freezing process, it’s essential to check on your ice cream regularly. This guarantees you achieve the perfect ice cream consistency. Here’s how to do effective texture monitoring:
- Timing: Check your ice cream every 15-20 minutes. This allows you to gauge its progress without letting too much cold air escape.
- Stirring: Give it a quick stir each time you check. This helps break up ice crystals and promotes a smoother texture.
- Taste Test: Don’t hesitate to taste a bit! This not only helps you monitor the flavor but also the texture. If it feels too icy, you might need to adjust your mixing technique next time.
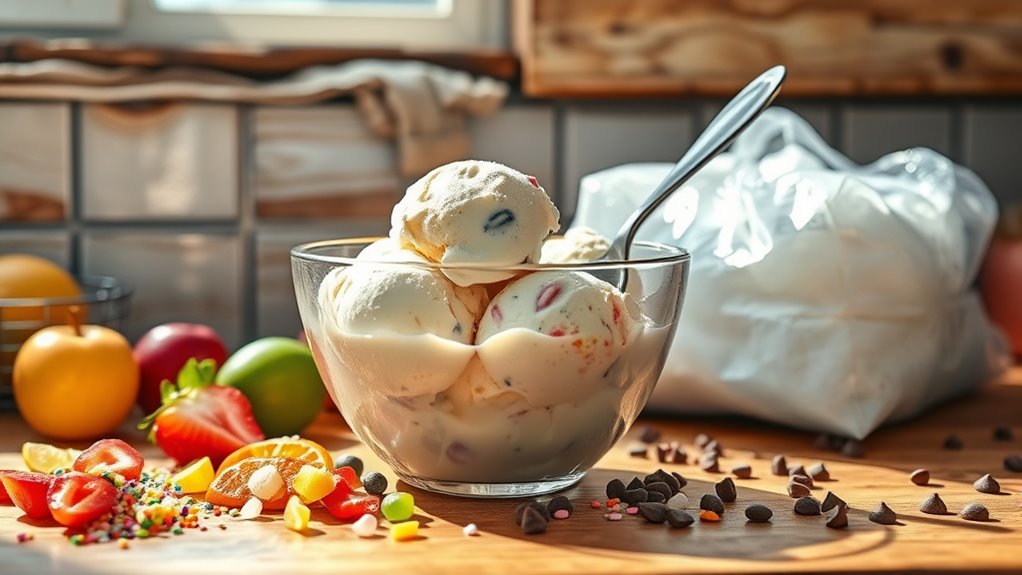
Step 7: Scoop and Serve: The Final Touches
Now that your ice cream has reached the perfect consistency, it’s time to scoop and serve. First, select your favorite scoop. An ice cream scoop with a trigger mechanism works wonders for ease.
Now that your ice cream is perfectly creamy, choose a scoop and let the fun of serving begin!
If your ice cream is a bit hard, run the scoop under hot water for a few seconds to make scooping easier. Use smooth, even scooping techniques to create beautiful, round scoops.
When it comes to serving suggestions, consider using chilled bowls or cones to keep your ice cream from melting too quickly. You might also want to layer your scoops for a fun twist or create a sundae bar with different serving options.
Whatever you choose, make sure to serve it immediately for the best experience. Enjoy each creamy bite and relish the satisfaction of your homemade creation!
Best Toppings to Enhance Your Ice Cream Experience
After you’ve scooped your delicious homemade ice cream, it’s time to improve your treat with some fantastic toppings. The right topping combinations can raise your dessert, adding texture variety and flavor contrasts.
Here are three topping ideas to contemplate:
- Fresh Fruit: Use seasonal ingredients like strawberries or peaches for a burst of flavor and natural sweetness. They add freshness and a delightful texture.
- Nuts and Seeds: Almonds or chia seeds provide crunch and a health-conscious option. They’re perfect for those who want a nutritious twist on their dessert.
- Sauces and Drizzles: Pour on chocolate or caramel sauce for a rich, indulgent experience. The gooey texture pairs wonderfully with your creamy ice cream.
Mix and match these toppings to create your perfect bowl. Enjoy experimenting with different combinations to find what enhances your ice cream experience the most!
Top 5 Mistakes to Avoid for Perfect Ice Cream
When you’re making ice cream, it’s super easy to slip up and mess things up without even realizing it. You might not think much about how important ingredient ratios, chilling time, and flavor balance really are for getting that perfect scoop. So, let’s take a closer look at the top mistakes you should avoid to make sure your homemade treat comes out delicious every single time.
Wrong Ingredient Ratios
Getting the ratios right is essential for making perfect ice cream, as even a small miscalculation can lead to a texture that’s either icy or overly creamy. To avoid the pitfalls of wrong ingredient ratios, keep these tips in mind:
- Base to Flavor Ratio: Stick to a 2:1 ratio of base (milk and cream) to flavoring (like vanilla or chocolate) to guarantee balance.
- Sugar Content: Aim for about 20% sugar in your mixture. Too little sugar can cause ice crystals, while too much makes it too soft.
- Stabilizers: If using stabilizers, follow the recommended amounts. Too much can affect flavor proportions and texture.
Skipping Chilling Time
Chilling your ice cream mixture is an essential step you shouldn’t skip, as it allows flavors to meld and guarantees a smoother texture. If you rush this process, you risk ending up with icy, grainy ice cream.
While quick freezing methods might sound tempting, they can lead to uneven textures. Instead, consider chilling alternatives like letting your mixture sit in the fridge for at least an hour before freezing.
This extra time helps achieve that creamy consistency you crave. Remember, patience pays off in ice cream making! So, don’t cut corners; give your mixture the time it needs to chill properly before putting it in the freezer. Your taste buds will thank you later!
Ignoring Flavor Balance
While it’s tempting to throw in a variety of flavors, ignoring the balance between them can ruin your ice cream. Achieving ingredient harmony is essential for that perfect scoop.
Here are three pitfalls to avoid:
- Overpowering Flavor Intensity: Don’t let one flavor dominate. Strong ingredients like mint or espresso can easily overshadow subtler ones.
- Mismatch of Flavors: Pairing flavors that don’t complement each other can lead to an unpleasant taste. Think about how chocolate and chili go together, but maybe not with vanilla.
- Neglecting Sweetness: Sweetness levels should match your flavor profile. Too much sugar can mask flavors, while too little can make your ice cream bland.
Stay mindful of these aspects, and you’ll create a balanced, delicious treat!
Frequently Asked Questions
Can I Use Flavored Salt for Making Ice Cream?
Yes, you can use flavored salt when making ice cream. Flavored salt adds unique taste dimensions, enhancing the overall flavor profile of your treat.
It can balance sweetness and bring out other ingredients’ flavors. Plus, it’s a fun alternative seasoning that lets you experiment with different taste combinations.
Just be mindful of the amount you use; a little goes a long way. Enjoy creating your own signature ice cream blend!
How Long Does Homemade Ice Cream Last in the Freezer?
Homemade ice cream typically lasts about two to three weeks in the freezer. Think of it like a fresh bouquet; it’s beautiful and delicious at first, but it wilts over time.
To maximize its lifespan, store it in an airtight container and keep it in the back of the freezer, away from temperature fluctuations. These storage tips can help you enjoy that creamy goodness a little longer, keeping it fresh and tasty!
Is It Safe to Eat Homemade Ice Cream Without a Churn?
Yes, it’s safe to eat homemade ice cream made without a churn, as long as you follow safety guidelines. When you use homemade ingredients, make sure they’re fresh and properly handled.
Keep your mixture cold during preparation, and freeze it promptly. If you’ve used dairy, consume it within two weeks for the best quality.
Always check for any off smells or textures before indulging. Safety first! Enjoy your delicious creation!
Can I Make Ice Cream Without Any Dairy?
Yes, you can absolutely make ice cream without any dairy! In fact, over 30% of Americans are opting for dairy alternatives these days.
You’ll love using plant-based options like almond milk, coconut milk, or cashew cream to whip up delicious, creamy treats. Just blend your favorite flavors with a sweetener, freeze, and enjoy.
It’s a fun, easy way to satisfy your sweet tooth while keeping it dairy-free!
What Type of Bag Works Best for Mixing Ice Cream?
For mixing ice cream, sturdy ice cream bags work best. Look for heavy-duty, leak-proof bags to guarantee your mixture stays contained while you shake or mix.
You can use techniques like shaking or rolling the bags to blend ingredients effectively. Avoid thin or flimsy bags, as they might burst under pressure.
A good-quality bag improves your mixing experience and helps achieve that creamy texture you’re aiming for. Enjoy your homemade treat!
Conclusion
Now that you’ve mastered DIY ice cream, imagine hosting a summer backyard party. You whip up a batch of creamy vanilla with chunks of fresh strawberries.
As your friends gather around, everyone’s scooping their own bowls, laughing and enjoying the sweet, homemade treat. You’ve created not just ice cream, but unforgettable memories.
So grab your ingredients, get creative with flavors, and make this summer one to remember with your delightful homemade ice cream. Making DIY ice cream is more than a recipe—it’s a way to bring joy and fun to any gathering!